Easy Mother's Day Gifts

Hello there!  It's Megan, from Mrs. Baker's Dozen!  I'm so excited to share this blog post today! Plus link it up with Doodlebugs, woo hoo!!


https://www.teacherspayteachers.com/Store/Mrs-Bakers-Dozen 

http://www.doodlebugsteaching.blogspot.com/


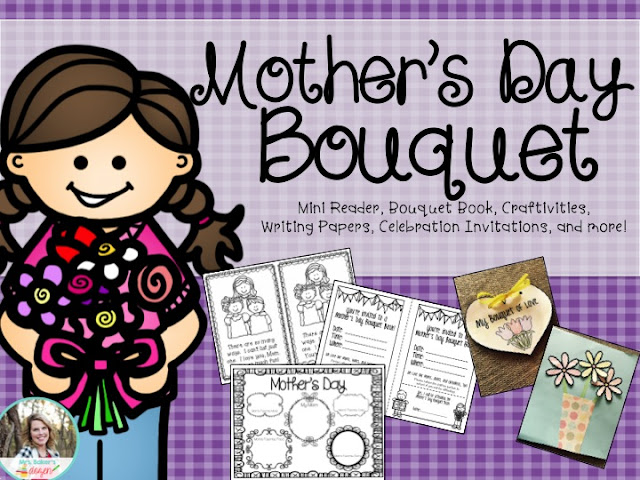
Today my first graders and I went all out and celebrated our mamas with a Mother's Day Bouquet Bash!  It was a celebration of mommies, aunties, and grandmas.  We showered them with some major flower power!


With just a few materials and your school's copy machine, you can create all of these sweet gifts!  

First is our Bouquet of Love book!  So simple and easy, just print, hole punch, and tie with pretty ribbon or yarn.  The vase of flowers can be printed, colored, and pasted on construction paper.  Or do what I did and cut the vase out of cute scrapbook paper ($3.00 a book at good ol' Walmart) and pasted just the tops of the flowers to make a FLIP FLAP bouquet.  Underneath each flower was part of a secret message, like I Love You.  My firsties decorated the classroom door with a Mother's Day directed drawing by Whimsy Workshop.  Too cute!


Our big gift to our moms was an adorable flower pencil.  Here's what you need to create it:

 All of these materials were found at my local Walmart and cost me less than $10! Score!

Your hardest steps are cutting the flowers.  Start with the leaf, which is my green cupcake liner.  Fold in half three times.  When it is a tiny triangle, trim off the top to a pointy leaf shape.


Next comes the petals.  Pick out the cupcake liners you want, then fold just them just like the leaf.  I did five here and that was pretty thick.  I would recommend cutting three at a time.  When you get to the last fold (tiny triangle) cut the top into a curve shape (petal).  Unfold and put the flowers in the order you want.  Take the leaf liner and put two tiny dots of hot glue towards the middle.  Layer the flowers on each other, putting the hot glue under each one so they all stick together.


 Finally, wrap some cute washi tape around a pencil (already shapened) and use a pushpin to attach the bloom to the eraser.  Voila!  Cute and easy gift for mom!


https://www.teacherspayteachers.com/Product/Mothers-Day-Bouquet-Activities-for-a-Mothers-Day-Celebration-2519736

 You can find all of these fun activities and more in my Mother's Day Bouquet unit!  Check it out HERE!  

Thanks for stopping by!


0

An Easy and Fun Way to Group Students

Hi, friends! It's Elsa from The Whole Wheat Class. The year is winding down and I know some of us have already begun that End of Year Countdown. How many of you think this time of year can be so hard? Your kiddos are stir crazy, you've got a million and one things on your to-do list, and yet there's still so many fun things left to accomplish before you say good bye!

I know I always love doing group work this time of year. My class seems so independent as we near the end of our time together, if I'm lucky! Pairing my kids on the daily can seem so tedious and sometimes...yes, sometimes...I hear groans from the peanut gallery. Sigh, the worst, right?  The two besties are already throwing each other side eye, trying to figure out how they can work together. Johnny-doesn't-think-anything-is-fun just rolled his eyes and mumbled, "hope I don't get paired with a girl!" (yes, every class has one!) and you've got 1:1 assessments to complete in a limited amount of time. Partner cards are the perfect trick. My kids beg for them! Let me tell you how I use them.

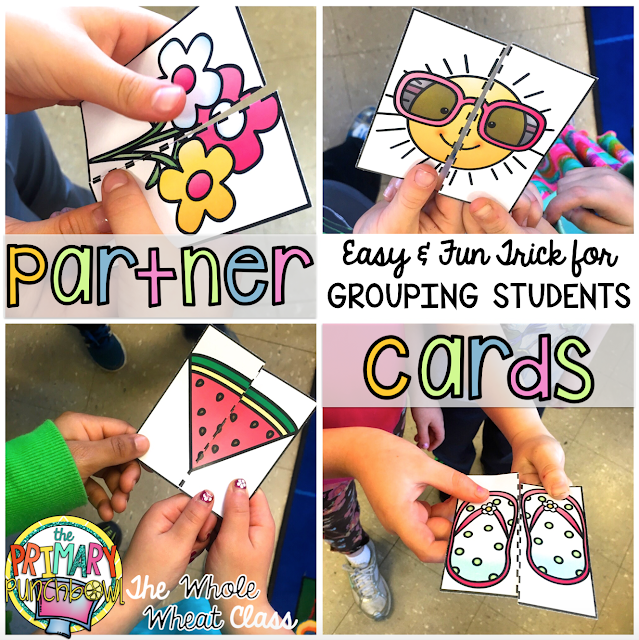
Easy and Fun Trick for Grouping Students: Partner Cards, Free, from The Whole Wheat Class

 Partner Cards, as we call them in my room, are just simple picture cards that I've cut in half. So easy, right? These particular cards have a fun Spring/Summer theme that my kids are currently swooning over. They get so excited when they get a new picture. I simply count out the amount of pairs I need, shuffle, and pass them out at random. The kids find their match, "pay" me their cards, and off they go to the centers I've already organized for them. 

You could do this with any type of card you have laying around. My math curriculum comes with a bunch of math game cards. My Mini-Wheats love to match numbers, addition problems, place value cards, etc. If you have phonics cards or center cards those could be used, too. 

BUT, Elsa, I don't have an even number of kids in my class! I know, me either! In this case I have an "odd man out". When I pass out the cards the person who doesn't end up with one is allowed to join any group they'd like. Works like a charm and no one feels left out. 

BUT, Elsa, I have a challenging group, I can't just pair my kids randomly! Then don't! I've definitely needed to get creative with groupings. With this trick no one needs to be the wiser. Organize or pass the cards out in advance. Sometimes I leave the cards at their tables after lunch. This gives me the chance to pass out the cards the way that I want my kids to be paired. They come back from recess and see Partner Cards and don't know the difference. Instant buy in from them and I get my kids paired how I want. 

 I hope you've enjoyed this quick and easy trick. If you don't have anything in your classroom that would already do the job here's the link to  FREE partner cards in my TpT store. Now, go get those assessments done and have a great End of the Year!!
We'd love you to post any fun grouping tricks you have in the comments below! Thanks for stopping by. -Elsa


1

Talkin' Politics in 2nd & a FREEBIE

Hey guys! This is Chynna from First Grade is a Fairy Tale
The year is quickly coming to an end and I can't believe it. 
Where has the school year gone?!? Here in Tennessee we only have 5 weeks left, which is so crazy to me. It really feels like just yesterday it was the first day of school. 


But anyways... I am blogging with the Primary Punchbowl today to share with you about our Election Week in 2nd Grade. My students this year have been all about the presidential candidates and talking about who they want to win the election. So with all their talk going on my co-worker and I thought, why don't we bring that into our classroom and teach them about how the election process works. And with that Election Week began. 


We started off the week by breaking up the class into four groups. Each group was assigned a presidential candidate that they would research. We chose four candidates (Trump, Sanders, Clinton, Cruz) for times sake. For the first two days the students read about their candidate and took notes on them. After taking notes on their candidate the students then had to decide how they wanted to present their information. Technology has been something I have really been trying to integrate into my classroom this year and with having 2 I-pads in our room, it made it a little easier to do. Earlier in the year I introduced some AWESOME presentation apps & the best part is they are FREE! If you have not checked them out or downloaded them yet, you have to as soon as you are done reading my post... The apps are Popplet lite, ChatterPix, and PicKids Collage. The groups chose to either create a Popplet or a Chatter Pix since those were the two newest apps I've introduced. This is what they look like... 

Below is a Popplet. With the Popplet students are able to create a web like presentation which they are able to include both text and images. 

Here is what the Chatter Pix looks like... 
The students really got a kick out of these. With the Chatter Pix the students choose a background image for their video. After selecting the background they can then draw a line where they would like the mouth to go and begin recording a 30 second presentation.

While the students were working on their presentations they were also campaigning for the class to vote for their candidate. Or for some, they were campaigning against their own candidate. Here are some of the student's campaign posters that they created throughout the week. 

These posters were hung around our classroom all throughout the week. Finally at the end of the week it was time to bring our Election Week to an end. So on the last day it was ELECTION DAY!!! My students arrived to our classroom that morning to find this on our classroom door.

They were so excited! They just couldn't wait till Social Studies time so we could actually vote. Before allowing the students to vote we spoke about how the voting process worked. We discussed that their votes should be secret and that they shouldn't share who they voted with others. In order to make it as close to the real thing I created a voting booth at the back of my classroom. I did this by turning a shoe box into a ballot box and setting it up in front of a test tent. 
I must admit I planned to make my Ballot Box a lot cuter, but I ended up not feeling well the night before and left it for the last minute. Oh, well that's TEACHER LIFE for ya, just Rollin' with the punches some times. Finally, when it was time for Social Studies my students came up one by one to cast their vote. They also received I VOTED stickers that were a HUGE hit. 
They absolutely loved it and surprisingly didn't share with each other who they voted for. 
After everyone had voted it was time to count the votes. And if our class was able to vote we would vote for... Drum roll pleaseeeee!!!!
Click the link for a freebie to get a copy of my presidential candidate pages.Click Here to Grab Your Freebie! Included you will find note taking pages, the ballots,and the If our class could vote posters!

I hope you all enjoyed my post. If you hold an election in your classroom I would love to see it in action. Feel free to #Firstgradeisafairytale and #primarypunchbowl 

Oh, and be sure to follow the Primary Punchbowl on Instagram. There will be an exciting post you won't want to miss in a few days. ;)
0

Spreading Teacher Kindness... Encouraging Fellow Educators

Hi, there! It's Erin, from Very Perry Classroom! Recently, we at the Punchbowl have been discussing ways we like to show love and kindness to others in the education world.. It can be an isolating profession, if you don't reach out for support and to support. We are so thankful for those who have supported each of us, and definitely want to share the love! Today, I am going to share a few ways I like to show kindness to others... 
The first way I love connect and appreciate other teachers is an idea that I cannot take credit for, but totally love. It's a concept that was created by Jameson, from Lessons With Coffee. A few years ago, Jameson saw a need for educators to feel connected to and encouraged by others if they weren't necessarily feeling the "love" where they were. She also saw that teachers LOVE to make new friends... And the idea for SLANT boxes was born! Jameson is amazingly organized and patient and matches teachers from the blogging and non-blogging worlds with others across the nation (Sending Love Across the Nation to Teachers). Each participant sends a box to their match, and communicates with them throughout each match session. I can honestly say I *love* making new SLANT box friends! If you would like to find out more, click here

Another idea that I love for spreading kindness to other teachers is compliment cards!
These great cards from Erin Condren are great to slip in a colleague's mailbox to spread some love or lift their spirits. There is plenty of room on the back to write a quick note to brighten their day!

Finally, I want to share with you what I have been doing with a few colleagues this Spring! 

Around Christmas, a few of us who are on the Sunshine Committee were talking about doing "You've been Socked!," which is a pass-the-stocking activity. We loved the idea of filling an object and paying it forward across the staff, but knew that we would not have enough time to pull it off. Then, we started talking about Spring, and it was suggested that we do "You've Been Egged!" This is a similar concept, but uses a giant plastic egg. We were sold. In the picture above is what I did with the egg when it was my turn to fill it. The point is to keep it anonymous, and to be as sly as possible. To keep people from being "double-egged," we had a staff list, and crossed off our recipient before leaving it on the front desk in the office each morning. I picked someone on staff who loves to bake, so I had SO much fun filling it with cute Easter baking supplies. Once our Spring holidays were over, we knew we wanted to continue going, but didn't want to use the egg. Since many of us on our staff use the book "Have You Filled a Bucket Today?" it was only natural to continue the activity using a bucket. I have PLENTY of Disneyland popcorn buckets, so we used a plastic bucket and have continued "passing the bucket." I LOVE to give gifts, but I LOVE to see people with lifted spirits even more! 


You can find a free original poem here if you would like to trying "filling your bucket" with your own staff!


Now, we at the Punchbowl would like to know:


You can grab the image below, if you would like to share on social media! Be sure to use the hashtag, so we can see your great ideas!


0

Reader's Theater via Google Hangout

Hi friends, welcome to the Punchbowl! Sarah from Mrs B's First Grade here to talk to you about a fun twist on readers theater today. Want to take yours up a notch with technology? Read on to learn how!


We have all used readers theater in our classroom to work on important reading skills such as fluency and expression. It usually involves a few students performing for your class or possibly another class in the school. Although this is fun and an effective strategy for working on these skills, it has been done time and time again. With amazing technology at our fingertips, why not try it a different way?


In my classroom we have been performing readers theater with other classes via Google Hangout or Skype. How do we do it? It's simple! Follow the steps below!

Step One - Find a Class
The first step for a virtual readers theater is to find a class to perform with. You can do this through social media (my favorite avenue is Twitter) or you can simply find a teacher friend from another school that is willing to try it out with you. Don't be afraid to ask - most teachers love to give new technology ideas a try!

Step Two - Select a Readers Theater and Plan a Time
The best reader theater scripts have two characters or roles on them. That way your class can take one and the other class can take another. There are a lot of fun ones on Teachers pay Teachers, or you can also use the books from the You Read to Me I'll Read to You series.

After you have your script selected, plan the day and time you are going to "meet" on Google Hangout or Skype. Don't forget about timezone differences! You will only need to plan for 15-20 minutes. That can include an introduction and a goodbye. One more thing you don't want to forget is to get the Google Hangout or Skype name of the other teacher. It is also a good idea to test your connection before your planned date.

Step Three - Practice!
After you choose which class will read which part, practice with your class! I usually do this whole group.

Step Four - Connect and Perform
The last step is to connect with the class and perform! Don't worry about it if your kids are not perfect, just have fun with it! If you can, have someone video your class participating. My class always loves watching how they did once we are done. It's also a great way to access your fluency!

It's as simple as that! If you have any other questions, please feel free to email me at mrsbarnettfirstgrade@gmail.com.

0

Create a Parent Survey to Encourage Communication and Collect Data


Hello, friends!  Elisabeth from Literacy and Lattes here today to share a crazy little idea I had...that actually worked!  Don't you just love when that happens?

In August I will be the parent of a kindergartner.  I have no idea how that happened...but it has me thinking a lot about the parent side of the classroom.    I've tried tons of different things to keep parents involved and informed...newsletters, website, Remind group texting, Facebook, Twitter, basic emails... it always feels like I'm missing something or I can't keep up with it enough to make it seem worthwhile.  

Anyone else in the same boat?

I teach in Ohio and one piece of our teacher evaluation system asks for evidence of "two-way communication with parents."    I struggle with this.  Even when I'm putting things out there for parents I don't see a big return...a few parent emails about specific questions, but nothing that really shows "accomplished" communication.

So how do I encourage more two-way communication?

I got to thinking that I needed a better idea of what parents actually want from me as far as classroom communication so I put together a little survey using Google Forms.  I sent it out to my parents and then had a panic attack...because what if they said horrible things?

A quick how to if you haven't used Google Forms:


Open Drive.  Click "NEW" then "MORE" and select "GOOGLE FORMS."


Click the "+" to add you questions.

Send the link out to your families and Google collects all the results.


I also sent a paper copy home with everyone, including a QR code so parents could easily access the form.  I got a few paper responses that I entered into the form myself to keep all the data in one place.  
My survey was focusing on communication so here's what I asked:


Honestly, I got some great feedback and now I have evidence of two-way communication from 50% of the families in my classroom.  

Google Forms give a great summary of the data, so it's easy to look at and all in one place.  


 You can select "RESPONSES" and look at a summary of all the data.


Or you can select "INDIVIDUAL" and see how each person responded.  I opted to keep my survey anonymous to promote honest responses, but did leave a place for parents to include contact information if they had a specific question or concern.  

Next year I'm planning on sending a parent survey each quarter so I can track the data throughout the year.  

I'd love to hear how you encourage two-way communication with parents!  

Cheers!


1

Summer, Summer, Summertime! Time to sit back and....grab some Freebies :)

Hi guys! Jessica here from Tech and Teachability. I'm excited to be back blogging on the Punchbowl today. Can you believe it's already April? Honestly, where has this school year gone? 

We've only got 35 days left. 

Of school. 

35. 

That's it. 

*mini heart attack**

And moving on. 

So I thought I would share some of the end of the year things I do in my classroom. I know that many of you don't get out until June, but I'm thinking that will be here before we know it. No time like the present to get things ready and organized. And give you some freebies!


This is the countdown we use! Everyday, we change the number. I've 24 students in my class and once we get to 25 days left, I let the students start keeping the countdown. I put the blank background in a page protector/dry erase board and hang it up. 

Click {HERE} for a copy!


This has to be my favorite. I have 10 envelopes and 10 slips inside. The slips are very simple things that can be done each of the last 10 days of school. 

Extra Recess Day
Move your Seat Day
Movie Day!
Ink Pen Day!
Markers Day!
Hat Day!
Stuffed Animal Day!
Aloha Day!
Shoes Off Day!
Lunch with a Friend Day!

I open a new envelope at the start of each day. It's so simple and the kids LOVE it! Movie Day and Aloha Day are usually our very last two days. Most of the end of year stuff is done (and a lot already go on vacation) so we spend an entire day watching movies and doing other fun stuff. Aloha Day is our end of the year party. We always have a luau! 

Click {HERE} for the pre-made slips.


And here is my newest summer creation. It's a Summer Fun Finder Flap Book. 

I am offering this flap book EXCLUSIVELY to readers of The Primary Punchbowl :) I will eventually upload it to my TpT Store but I want you to have first dibs. 

UPDATE!!! This has been added to my TpT STore. Click HERE to download for FREE!!

The Word List is editable. 

The family fun list is editable (not the QR Code). 

All of the summer sites are editable - change out the QR Codes or delete them and just add what you want!

Two bingo boards - one road trip (not editable)
Summer Bingo is editable

Coloring page and brag tags (not editable)
But you can delete my brag tags and add your own or change this flap altogether. 

All of the labels on the flaps can bee changed, too, as well as the fonts. All you have to do is print it out, copy it double sided, stagger it, and fold it over. Staple it and it's done!


Here is a super quick video showing how to put it together: 


Another one of my favorite end of the year activities is one that my principal gives to us. We always have an end of the year party that's themed. Last year it was Academy Awards. The year before it was Fabulous Fruit.
We got to walk the red carpet last year. So fun! I can't wait til this year!

That's all I have this time! I really do hope the end of the school year is fabulous for you and I hope I've given you some doable ideas! 

Have a great April!


1
Powered by Blogger.