Winter Science Experiments

Hello there!!  I'm Megan Baker, a first grade teacher born and raised in Kansas, blogger at Mrs. Baker's Dozen, and currently 5 lbs overweight.  Well....it could be ten.  What can I say?  I love Christmas candy! :)


In my first grade classroom, we absolutely love science!  I mean, LOVE.  The second I say the words science experiment, the room is silent.  Even the chattiest of kiddos.  It's quiet because they know by now that they will have instructions to follow and if they don't listen, they don't get to participate.  Sad, but true my friends.


I have two experiment tips for you.  Before you start a major experiment, I would go over your expectations.  I would create a quick anchor chart to hang so that kids can be reminded easily.  


The next tip would be to practice it beforehand!  I tried these two with my daughters.  If it gets my girlies excited, I know it will be a home run! :)  

Our first one is the Arctic Volcano.  Here are the printables included in my Winter Science pack.


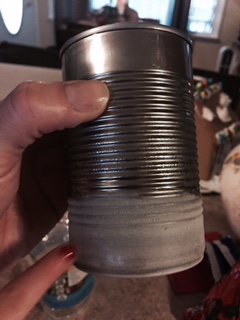
We use this same experiment in September when we study apples.  Instead of carving out the middle of an apple, we put the baking soda in a small plastic container, set it in another bigger container, and surround it with ice to create an 'Arctic Volcano'.   We added blue food coloring at the end and it was a success!!


Our next experiment is Baby, It's Frosty Outside.  Totally simple and easy, a great way to introduce a unit on snow/ice/arctic animals.  


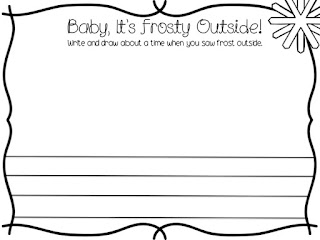
Simple, but so fun to write on some frost that we made ourselves!  :)  

I'm so happy to be apart of this sweet collaborative blog!  Thanks for joining me here today and if you'd like to take a peek at the rest of my Winter Experiments pack, you can see it on sale at my TPT Store HERE.  I've included a snowflake life cycle interactive reader, too.  


Thanks for stopping by!!!    

;) Meg


1

Using Crayons To Teach Responsibility?

So, you're a teacher. I'm guessing in the primary grades. Though perhaps you are one of those incredibly brave souls that spends their days working with upper elementary or (gasp!) middle schoolers? (If so, you have my full and complete admiration.) Here’s my question for you today: have you ever spent too many precious minutes seconds of your day picking up pencils from the floor? Colored pencils? Crayons? Sharpening any of the aforementioned items? Well, my job today is to share my secret so that you never find yourself doing this again, while also teaching your kiddos responsibility at the same time.


I should probably start by introducing myself. I’m Nicole from Why Pencils HaveErasers and thrilled to be joining my favorite teacher-author-blogger-creators over here at The Punchbowl! 

Anyway, back to the good stuff. Let’s flash back a moment to August. Here I am at every teacher’s favorite place, Lakeshore Learning, excitedly dreaming of the year to begin. New students, grand ideas, the world was my oyster. I picked up some brand new supply caddies, color coordinated to my new classroom theme, without a second thought. Why give even think about the distribution of materials? I’d do what I’d always done shared caddies at the center of our tables, common materials for all.


Let’s flash forward to the end of October. Here I am, nearly through my materials for the. whole. year. and at the end of my rope. Pencils and crayons lost to the wind, EATEN, or otherwise dismembered. And don't even get me started on the colored pencils and erasers. It was time for drastic action. Determined not to purchase a single new material for my students, and to teach them how to responsibly care for these tools, a new system was born. Move over sharing, it's time for individual materials. 

Now, I get it. Sharing is caring and certainly an important skill in any first grade classroom. But how could I possibly ask my kiddos to share these items responsibly if they couldn't manage them independently first? In any case, there's at least 2,346,789 times of the day when my 23 students are forced to share SOMETHING. I decided sharing could take the back burner on this one. 

If you walk into my classroom now, you'll see a small container of some kind at every seat. Larger tables of four or more have small sterelite drawers and smaller tables of two or three have individual baskets. All labeled with a velcro name tag so that we can easily move materials as we move table seats. And all looking something like this:

In each child's container you will find: a pencil, an eraser, a handheld sharpener, one box of 24 crayons, and 12 colored pencils. Everything that they could possibly need for the work that we do (I withhold markers for choice time only, and glue sticks and scissors are still shared). I drained my supplies to give everyone fresh, new, beautiful materials. When my students walked into our classroom to find this new set-up, plenty of oohs and aahs ensued. The excitement in the air was palpable, perhaps mine most of all. 

As we all sat down to morning meeting, I unveiled our new social experiment. I explained about the missing materials, running out of items to give them, and, of course, added dramatic flair where necessary. I showed the new containers of materials, meticulously went over what was inside, modeled how to count and organize to make sure nothing went missing, and explained that these were the last materials I would be giving for the year. That's it people. Sensing the excitement (and now shock) in the room, I asked my 23 six-and seven-year-olds if they were up for the challenge. Could they keep track of everything? Everyone agreed they could. Hooray! And so we began.  Can you believe I didn't find, pick up, or otherwise deal with a single dropped material for FOUR WHOLE WEEKS? I never answered one question about someone needing a blue-green crayon, or a black colored pencil, or a pencil sharpener. I didn't sharpen any pencils or colored pencils. It was heaven.

Until that one day when the first person lost their pencil. I quickly realized I am way too soft, and could not stand firm on my promise. I suddenly realized how unrealistic it was to expect my firsties to never lose anything for a casual... six months. Given the rate at which I lose my much beloved Flair pens, it also seemed highly hypocritical. But I was still determined for students to be responsible for managing the replacement of lost or damaged things. I wanted no part in this. They could do it I felt, if I could just give them the way. Enter replacement bins:


I already had the colored drawers, and I quickly grabbed two containers for pencils and erasers/sharpeners. Find a purple crayon on the floor? Put it in the purple drawer. Missing a red colored pencil? Go grab one from the red drawer. Ditto for pencils in the pencil cup and erasers/sharpeners in the other bin. Everyone seemed to breathe a little easier with this new found flexibility in our system, and I still haven't answered any questions, complaints, or tears about materials. 

The week before winter vacation, we had our first family breakfast celebration. I excitedly asked my students which piece of their learning they were most excited to share with their families: Your beautiful shadow artwork? Nope. The kind words in your reflection journals? Try again. Well, then the beautiful letters you wrote to our community members? Not a chance. MATERIALS. All they wanted to share was how they were responsible for having their own things, the care and thought they had put into keeping them safe, whole, and uneaten (sigh), and how they could independently problem solve in the face of a dilemma.  It was working! I was thrilled to see how excited my students were to have total control and responsibility of their things.  

Needless to say, during my summer stop at Lakeshore next year I will not be buying more supply caddies, because I am in love with our new system and am thrilled to see my students becoming more independent and responsible with everything in our classroom. After all, this leaves more room in the budget for cute borders, right?

Thanks for stopping by!

Nicole
5

Grinch Day

Hi, everyone! I'm Elsa from, The Whole Wheat Class and I am so thrilled to be bringing you my first post for The Primary Punchbowl. What an honor to be associated with this great group of teachers.
The countdown is ON for Winter break and some of you lucky ducks are already home netflixin', baking', and relaxin'. I can't wait to join you! 
I'm here to re-cap our Grinch Day. I hope you'll be able to pin some ideas for next year or incorporate some in your celebration this year, if you're still working. I'd also LOVE if you would comment with your own Grinch Day ideas.
I do Grinch Day a little differently than some. For my class, Grinch Day is a complete surprise and it all begins with our Secret Snowflake Challenges. (You can read about that HERE.) Basically, about 2 weeks before break, I challenge my students to perform as many random acts of kindness as possible. This year we began on the anniversary of the tragedy at Sandy Hook, December 14th. My kiddos are only in 1st grade so I don't go into detail about what occurred that day. Instead I challenge them to come up with 26 random acts of kindness (one for each life lost that terrible day). We write them on hearts with the premise of teaching the Grinch how to be kind. 
This year my sweet little Mini-Wheats were so inspired, they were counting their random acts of kindness all day. "Mrs. Wheat, I'm on RAK number 19!". Hey, whatever it takes! I hope those 26 lost souls could feel all the love and kindness being spread in our classroom and school that day. I like to believe that they could.
Over the next few days we carry out our Secret Snowflake missions throughout the school and community (random acts of kindness). Once all of our missions are complete I  surprise my kids with Grinch Day!
I stay late and decorate the classroom. Green tinsel garland, green snowflakes, green candy canes on our tree, as much green as I can find. This year I confiscated all their supplies and left them only green crayons and tiny golf pencils to work with! 
I also changed our rules with Grinch labels and turned everyone's behavior card to red.  You will also notice the date is wrong. But the thing the drove my kiddos right over the edge....
I changed all of our computer screens and iPad screens to pictures of the Grinch. They flipped when they saw it. I think at that point they truly believed that this wasn't some trick I had played on them but that the Grinch himself had really taken over our classroom. 
Unfortunately for my kiddos we still had a normal morning of learning. I made sure to copy our activities on green paper but we needed to get through Reader's Workshop and Writer's Workshop because we MUST complete this unit before break. #thestruggleisreal. In order to get my kids back on track and ready to get down to business I read them this note the Grinch left us. We talked about what terrible ideas he had and how awful it was that he STILL didn't seem to understand how our classroom works. By the end of our conversation my kids were down right MAD. To be honest I was a little worried I'd gone too far. :) I told them we absolutely had to PROVE to the Grinch that kindness and good behavior were important and the only way to be. I'm here to tell you that they bought it, hook, line, and sinker. You could have heard a pin drop during centers and every. single. kid. finished their opinion piece in Writers Workshop. It was a Grinchy miracle...could also be that I promised them that we would watch The Grinch movie in the afternoon if we got all of our work done. :)

After our afternoon special my Mini-Wheats returned to the classroom to find this note on the smart board, all of their supplies back where they belonged, and Who-Pudding as a snack. They were so dang proud of their little ol' selves.
For the last surprise of the day: Who -Pudding. 2 drops of green food coloring hidden in the middle of the cup + instructions from the Grinch to stir = magic.  
This was a day my firsts will not soon forget. I love this tradition and I LOVE reading about and incorporating all the other great Grinch Day ideas. Got one? Be sure to comment below!
If you're interested in learning more about my holiday plans, freebies, free gift tags,  Snow Globe ornaments, Secret Snowflake Missions, and so much more, I hope you'll join me at The Whole Wheat Class Blog, Facebook Page, and Instagram.
Thanks so much for stopping by! I hope you all experience the magic of the season and a wonderful, restful break!


0

The Question Board

Hey guys!!


I’m Chynna, from First Grade is a Fairy Tale!
With the New Year approaching now is the perfect time to think of what is going well and could be a little better in your classroom. Last year, I found that my students always had a million and one questions. And they were silly questions that I most likely answered when giving directions. So today I am going to tell you about my classroom sanity saver :: The Question Board!


So… Here we go! In the front of the room on my white board I created the “Question Board.” 


What? Where? Question Cards 

These question cards were inspired by First Grade Glitter and Giggles.


Under the questions, you’ll help your students answer: “What can I use?” “Where can I work?” and “Where does this go?”

In my classroom we are usually using a variety of materials at a given time so I placed magnetic tape on the back of these cards. This allows me to easily switch the materials out that we are using from activity to activity. The same goes for where the students may work. Some lessons the students need to work at their desk but there are others that I allow them to freely choose where they would like to work.

Now for the, “Where does this go?” I placed these cards on a small binder ring that I placed on a mini hook. Having these cards on the binder ring allows me to easily flip to the card telling students where to put their work when it is complete.

Having these question cards on our board has really helped to save my sanity so far this year. Feel free to grab these FREE question cards here.

Voice Level Cards


I also have voice level cards up on this board. These cards are great because they help to remind my students of what their conversation level should be during the activity. In order to indicate their level I cut an arrow out of scrapbook paper and put magnetic tape on the back. These awesome cards are from Reagan Tunstall. Grab them in her store by clicking here!!  (BTW they’re free J)

Early Finisher Cards


The last life saver that I have posted is my “I’m Done, Now What?” Cards. These have been a huge sanity saver. Ultimately help me to avoiding the “Ms. S, I’m Done! What do I do????” (btw… It’s one of those questions that just drives me crazy inside!!) There are plenty of options for you to give your students to complete when they are done working. I usually keep 2-3 cards posted throughout the day or per subject. If you’d like to check these out click here to head on over to my TPT store. It is available in polkadots, owls, and superheroes.

I know this may sound like a lot but I promise it is worth the extra few seconds. You will quickly be repaid with your sanity!!

I hope you found my Questions Board to be resourceful. 

Thanks so much for stopping by to read my post and 
hang in there Winter Break is near!!!!!

<3 
0

Parent Presents in the Classroom

Hello, again! I'm Erin, from Very Perry Classroom!
Do you have trouble thinking of what to have students make for their parents every holiday season? Are you breaking the bank trying to create something that shows parents at least an ounce of how valuable they are to you and your students? We at The Primary Punchbowl want to share a few ways we, and others we have found, are making parent presents. 

Up first is Jessica from Pride and Primary!!

She had her kiddos make some ADORABLE frame ornaments, and the good news is: they are relatively inexpensive and, she says, very easy! She began by taking her students' pictures holding a sign with their names and future occupation. How sweet is this girl!?! She then had students glue pasta pieces on a paper plate with a hole cut in the middle. She spray-painted the whole thing, punched a hole at the top, and looped a ribbon through the hole to hang it. Then, she added the printed picture, and has a super cute, easy, and inexpensive present to show parents appreciation!

Next up is Melinda, from Tales of the Sassy Teacher!
She made these adorable reindeer ornaments. She also let her students hang them on the class tree before she wraps them up and sends them home! Aren't these just a fun trip to the North Pole?
What you'll need per student is simple: a brown clothespin, 2 googly eyes, a red pom pom (for Rudolph), and brown pipe cleaners (for antlers). All you need to do to assemble is paint the clothespin brown, glue on the eyes, twist the pipe cleaners into antlers and glue on clothespin, and add the nose. I recommend using tacky glue, but if you want to assemble using a hot glue gun, PLEASE do not let students near it! :) 

In my class, we have been doing our project in stages. We have had a lot going on, as the rest of you have, as well, with Winter Song Fest practice, indoor recess, and more. So, we started with our blank canvases. ;) I made the same project with my students last year, so I scoped out Michael's for the same deal this year, and was able to get the canvases for 50% each pack, as well as my teacher discount. HUGE SCORE. This is what I got. I ended up spending LESS than $20 for 18 canvases, and they are a nice solid block to paint. First, we painted them blue:
Then, we added a white hand print. Once the hand print was dry, I had students draw snowman faces, hats, and noses using permanent markers (don't worry, they were supervised). Finally, they added stripes of paint for scarves. Every single block turns out different, but every single one turns out to be a treasure. 


I have to tell you, I got a new student last week, and was SO worried about what to do. I had most of the projects in the final stages when the kiddo arrived, so I took a look to see if they sold the canvas in single packs. No. Such. Luck.I didn't want the kid (or their parents) to feel left out, so I had to think of something!! This past May, I had a parent project I made with my students for promotion. I had 2 picture frames (from the dollar store) left, so I made the same project in a different way. I MAY just do this next year, if I don't find the canvas on sale when I need it next year. 


Tomorrow, my students will be stamping brown bags and wrapping up their presents. 

For our cards, we made these fingerprint lights:
Our caption will say, "You brighten up my life!" 


My students are OVER THE MOON excited, as most students are this week, to give their parents their OWN presents! 

Finally, we have our wonderful Laura, from Luv My Kinders...
These are actually last year's presents, but SO darn cute!! Take a look....


I found a few other fun ideas from Pinterest (surprise), and thought you may like the ideas as well. Click on each picture to be taken to the original post.
Framed silhouette
Simple, yet a treasure
A personalized candle!
Clay pot trees

What are your favorite parent present ideas? Happy Giving!


0
Powered by Blogger.