Voting: The Great Cookie Election

Happy Halloween! It's Elisabeth from Literacy and Lattes with my first Primary Punchbowl post!  Yay!  I'm so happy to be blogging here with these fabulous, talented teachers!

Here in central Ohio we had trick-or-treat on Thursday night, so today feels a little anticlimactic...BUT how cute are my little Muppets!?!


OK - down to business!  It's election week and even though this isn't a big one in Ohio, I love teaching my first graders about voting.


This is such a fun unit to teach and the premise is simple:

Which cookie is best?  Oreo or Chocolate Chip?

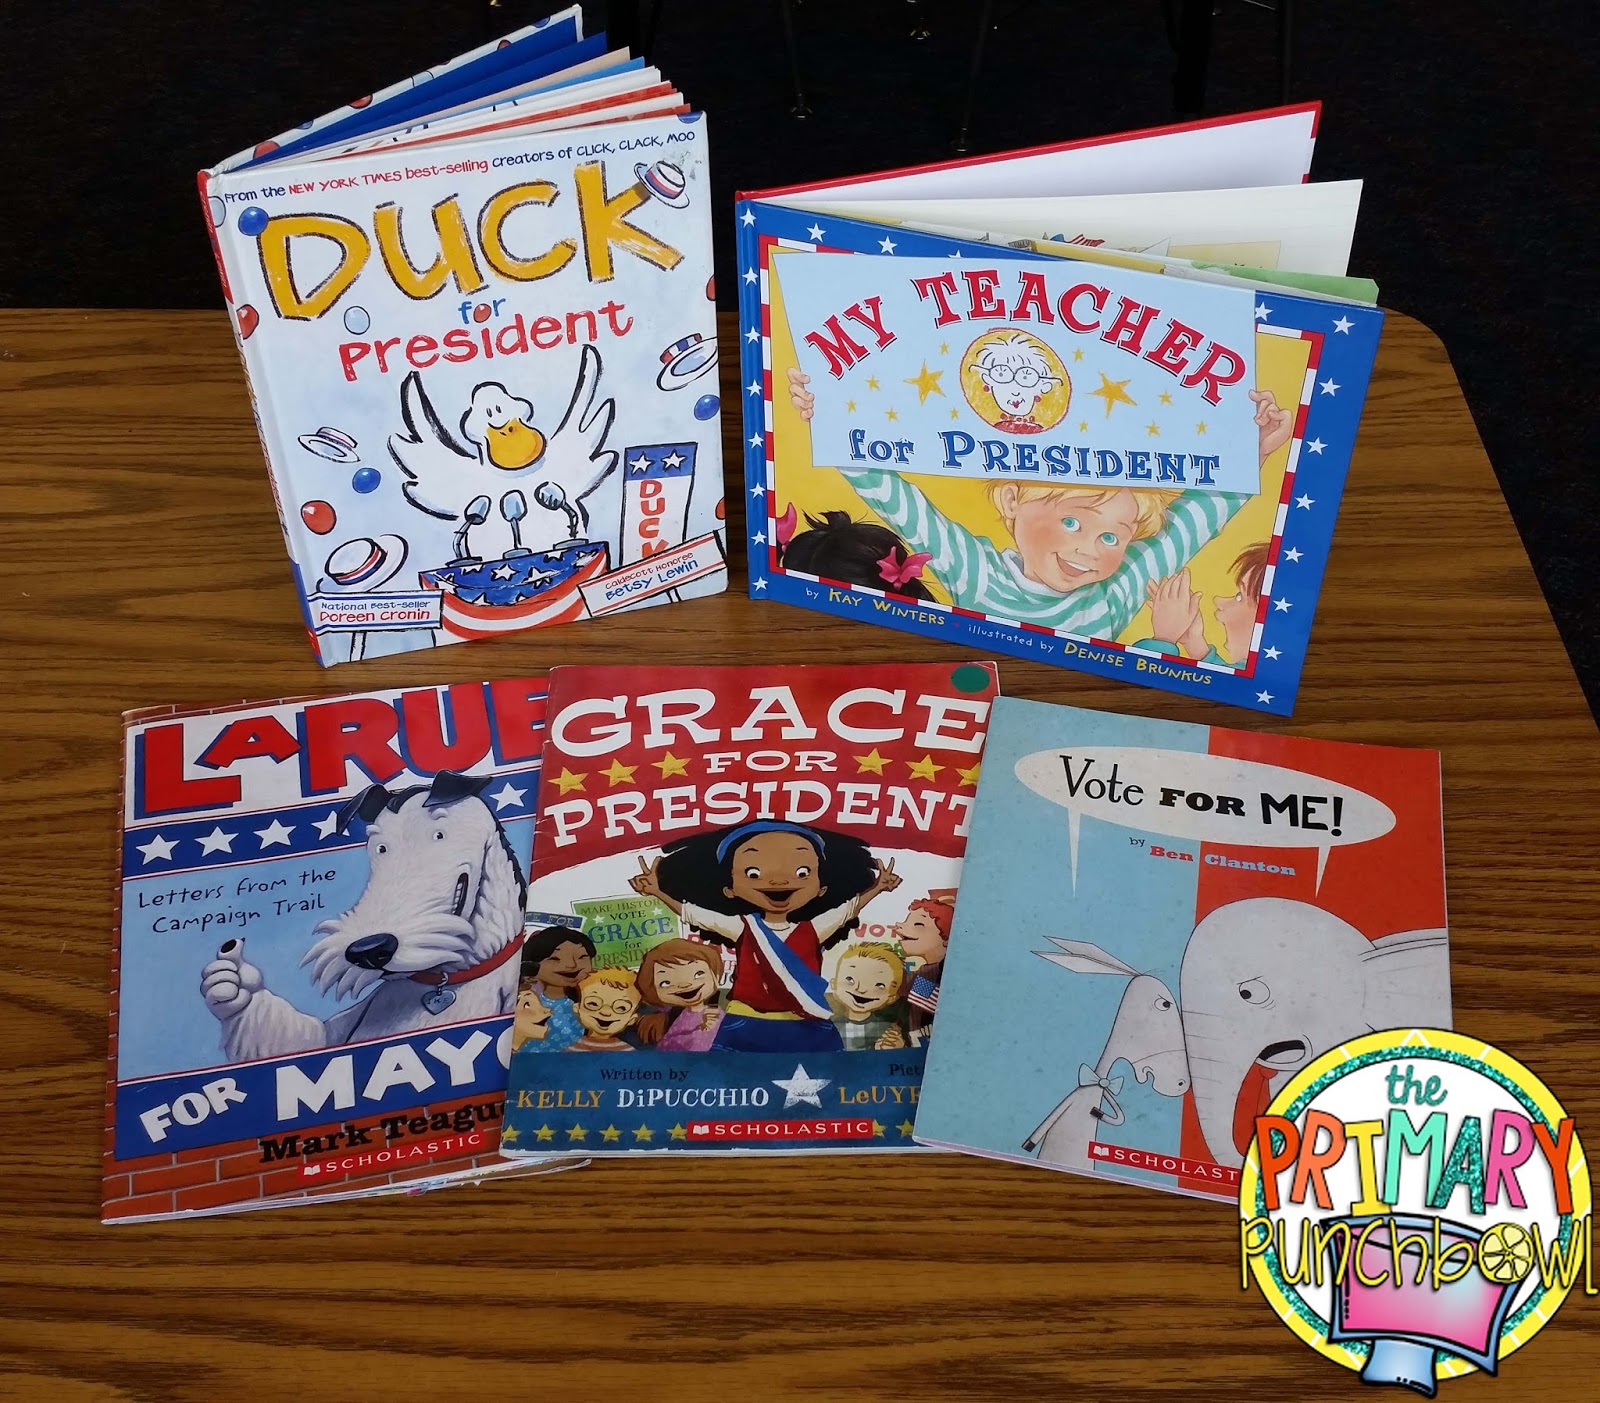
 I like to start with the book Vote for Me! by Ben Clanton and talking about commercials, yard signs and ads.


These are some of my other favorite voting read alouds that I use throughout the week.  


To get an idea about advertisements, we watch a commercial for Chips Ahoy and one for Oreo and then taste test the mini version of each cookie.  


Next the kiddo make a "yard sign" for the cookie of their choice.  We hang our yard signs in the hallway to help advertise for the cookie each kiddo wants to win the election.


On the first day we also register to vote.  The kiddos make their own drivers license to bring to the polling place on voting day and I add each of their names to the Registered Voters list. 

Then...It's voting day!


Just like a "real" polling place, we make sure anyone coming by our door knows it's voting day!
When it's time to vote, I try to set up the room so it looks like the places their parents will go to vote. First, the kiddos bring their drivers license to the Voter Check In table and sign in to vote.


Once they have their ballot, they vote in our super secret voting booth....


And cast their ballots....


After voting, we use this graph to tally the votes. (Click the image to download the graph freebie!)


You can see the whole Cookie Election unit in my TpT store by clicking here.  

The next day we enjoy the winner cookie!  In my class it has almost always been a landslide win for chocolate chip...I'm curious to see how it turns out this year!

Happy Halloween and happy voting! :)


4

Say Goodbye To That Costly Treasure Box


Heyyyy! I’m so glad you’ve stopped by our blog today. J I’m Chynna from First Grade is a Fairy Tale. I began my TPT journey just over a year ago and am super excited to be a part of the Primary Punch Bowl. The Primary Punch Bowl is made up of some awesome teachers. I feel so lucky to have met them and be able to collaborate with them on our blog.

My first couple of years teaching I battled with the good ole’ treasure box. Using it as a classroom reward was really putting a hole in my practically empty pocket. I mean, we all know, that us teacher don't teach for that hefty paycheck on pay day. So last year, I decided I had to find a way to get rid of my treasure box and still keep my students motivated to do well behaviorally.

Just like teachers all over when I was in need of some new ideas I of course went to Pinterest!!

Don’t worry I’m sure I was only looking for 5 min or so, said NO Teacher Ever!
I came across the idea of behavior coupons and instantly loved the thought of the idea but was hoping my students would love them just as much. So of course I just had to find out and began creating classroom coupons to fit my student's interests. 

So I began thinking of coupon ideas my students would love.. like sitting in the teachers chair, picking the GoNoodle, and many more... You can check out my behavior class coupons in my TPT store by clicking the picture below.  

How I use them

I use these class coupons in addition to my color chart. 
At the end of the day my students choose a coupon that matches the color they were on. My students can not wait to choose their coupon and redeem it the following day. 


How I organize them

I keep my class coupons in a binder. They stay nice and organized inside coupon protector sheets. I found these coupon sheets in the clearance section at staples a while back. But you can also find them on Amazon Prime here! Next to each coupon is a colored dot, like the ones you use at a garage sale. (bought at the Dollar Tree) These colored dots help my students to know what coupons they can get for being on purple and which they can get for being on pink. If they are on blue, I give them a seasonal sticker. :) 


The Royal Wall


In addition to using class coupons I have an added incentive for my students. It is called the ROYAL WALL. Whenever a student gets on pink (the highest color on our behavior chart)  they earn a jewel on their clothespin. These jewels are self stick and were purchased at Michaels. If you want to save money you can even give them a colored dot on their clip with a marker or use small round stickers. 


When a student earns 3 jewels on their clip their name goes on our class’ Royal Wall. The kids get super excited to see their name on the royal wall because this also means they get to be ROYALTY for the day. Being royalty for the day (or VIP) means they get to use our class’ ROYAL supplies. 

If you haven’t caught on yet … 


my classroom is Fairy Tale themed! J


I was inspired by the Mrs. B First Grade who has a VIP table in her classroom. I really wanted to make an exclusive table for my ROYAL students, however, space was not on our side. So I did the next best thing and created a traveling ROYAL supply caddy. These are used only by the ROYAL students. In the caddy are “Special” supplies such as fun erasers, smelly markers, fancy pens and pencils, and colored glue. The students love getting to use the ROYAL supplies for the day 

I hope through this post you've gotten some ideas that can help you get rid of that costly treasure box, while keeping your students motivated to do well behaviorally. 

What behavior rewards do you use in your classroom? 
3

Shared Reading In The Primary Classroom

Happy Friday everyone!  This is Jayme from Teach Talk Inspire and I am so excited to be writing my first post on The Primary Punchbowl!  These fellow bloggers have become a wonderful support system for me and I am honored that I'm able to share my ideas and learn from them through this blog.   For my first post, I wanted to pop in and share something that I've been working really hard to implement and tweak this year; shared reading.
My district worked very hard over the summer to revamp our literacy block and move further away from using a traditional basal and more towards embracing a balanced literacy approach in our instruction.  To say this was a welcomed change would be an absolute understatement.  I am loving the new way we're instructing my young learners to read and the different components that I'm now adding into our literacy block.  For those of you who are unfamiliar, balanced literacy is composed of several features including:
  • Interactive Read Aloud
  • Shared Reading
  • Independent Reading
  • Guided Reading
  • Word Study
  • Interactive Writing
  • Shared Writing
  • Independent Writing

I won't lie, it's TOUGH to fit all of the components in every day.  But, I've been trying to do as much as I can and still make it enjoyable for my students.  The area I'm finding the biggest success with is the shared reading component. I've been lucky enough to train with staff developers from The Reading and Writing Project on the subject and I'm hoping the information I've received from them will help others!   I wanted to take a little time today to share what shared reading is and then what it is not.  I'm hoping that by shedding some light on this valuable piece of your literacy block, that I'll inspire some of you to take the plunge and give it a try! So, let's get started!

What Is Shared Reading?
Shared reading is an interactive reading experience that occurs when students are encouraged to participate or share in the reading of an enlarged book or piece of text with the teacher.  The responsibility of the reading is shared and doesn't fall solely on the teacher or the student.  It weaves together all parts of the reading process, including searching, monitoring, comprehension, and fluency.

My favorite way to explain shared reading is by a quote from Brenda Parkes that was shared with me and a group of other teachers from a TC staff developer.  Parkes says that, "The physical setting (of shared reading) has to become the equivalent of twenty or more children on my lap at one time."
How perfect is that?!  I've been trying to take that quote and really put it to use when I'm conducting my shared reading lessons throughout the year.  Shared reading is a time when students should be encouraged to shout out, read aloud, echo read, choral read, whatever makes you comfortable but they should be encouraged to GET INVOLVED!  

Shared reading can be approached in one of two ways.  The first way to use it in the primary classroom is by choosing ONE text to use across the week but have a different purpose to use with it each day.

Another way to structure your shared reading plans is to choose a different text each day of the week but focus in on one skill throughout the week.  For example, you might focus on teaching students to track their words across the page or read through an entire word to make sure it makes sense with the picture.  Whatever purpose you choose, stick with it for the entire week.

This year in first grade, I've been been planning my shared reading time based on the first approach; same book for the entire week with a different purpose each day.

What Should A Shared Reading Session Look Like?

To properly implement shared reading, your session should not go longer than 10-15 minutes.  The purpose of your shared reading time is to keep your students engaged!  Go longer than 15 minutes and the chances of losing the attention of your sweet little friends is VERY high!  Each session should have:
  • A warm up text: Something students have read before and are familiar with.  This could be an alphabet chart, a word study chart, a familiar poem, nursery rhyme, or class song.
  • Enlarged text slightly above student reading level.  The text can be enlarged on the SMART board, projected under a document camera, or be a big book for all to see.
  • A purpose
  • Possible follow-up activities for your fifth day of re-reading.
A Shared Reading Weekly Schedule:
Something I have found that really words for me and was suggested by the Reading and Writing Project, is to stick to a weekly schedule for shared reading focus throughout the week.  Each day I may use the same text but I am focusing on a different skill while still tucking in some important comprehension and reading foundational skills.  Every day I reread the text and focus in on a skill using this schedule:
  • Monday: Preview the text, make predictions, and introduce a comprehension strategy like retelling
  • Tuesday: cross-check with students.  Play guess the covered word and focus on asking "Does it look right?" "Does it sound right?"  "Does it make sense?"
  • Wednesday: Focus on vocabulary/high frequency words--I love to have the kids use jazz hands when we read a sight word OR glow in the dark pointers to point to the words that we come across on the word wall.  You can even have students listen for a word study pattern and write it in on white boards.  The possibilities are endless!
  • Thursday: Focus on fluency and pay attention to punctuation in sentences
  • Friday: Extend the story with comprehension activities like a story map, reader's theatre, exit ticket, or response to reading activity.
Where Can I Find Shared Reading Materials?

Here is a list of great resources that I've found and links to their sites:


What Is It Not?
  Round Robin Reading.  

I hope this post inspires you to give shared reading a try in your classroom!  If you're looking for an easier way to plan your shared reading sessions across your week, you can check out my Workshop Teacher Planner in my TpT store by clicking the image below.  


I hope you have a great day!  Happy (almost) Halloween!

Jayme

  
2

Turkey Trouble Writing Activity

Hi this is Diana from MyDayinK and I am excited to be writing my first blog post for our Primary Punchbowl blog.  I hope that you are surviving the crazy week before Halloween festivities.  To be quite honest I am not sure if I am going to make it. ;) If a full moon the week of Halloween wasn't bad enough my voice has decided to take a vacation.  Teaching a room full of kindergarten kiddos with a squeaky voice has certainly been a trick and definitely not a treat!  Let's just say I have resorted to a lot of hand motions.  Enough about me though, today I thought I would share an activity I do in November with my kiddos with the book Turkey Trouble by Wendy Silvano.  


If you haven't read this story it is about a turkey that does not want to get eaten for Thanksgiving dinner so he disguises himself as different animals around the farm hoping to blend in and be left alone.  

The book lends itself to some great vocabulary discussion about what a disguise is and why someone or something would use it.  After we read the story we make our own turkey in disguise.  I give all my students the same turkey image and they color and then use construction paper to create a disguise to hide their turkey.  In the past years I have seen some very creative ideas such as a cowboy, dinosaur, princess, football player, and elephant. 


Once the students finish their turkey then they use the writing sheet below to write what their disguise is.  We hang these up on our bulletin board for the month of November.  


Thank you for taking the time to stop by.  May the force be with you as you tackle the rest of this week with all the craze of the full moon and Halloween!  The couch is calling my name and I must answer so I will be binge watching Netflix and sipping some hot tea in hopes that my voice makes its appearance tomorrow. :)  Have a great rest of your week!

Diana

2

Five Little Pumpkins + A Freebie

 Hi everyone!  This is Sara from Sara J Creations and I have one of my favorite classroom activities for Halloween to share with you today.  I love using The Five Little Pumpkins with lower elementary students.  There are so many activities that you can do with this.  Each year, I would change it up a bit, depending on my students.

I would usually start with an anchor chart and the words written out like a poem.  I would also give them a copy that they could put in their poetry binders.  I team taught a first and second grade multiage class for four years.  We would usually just have the first graders read the poem, highlight sight words and practice reading it over and over.  We were trying to build their confidence as readers along with more text that they could read independently during reader's workshop.

For our second graders, we always tried to take it a step or two further.  We would usually work with them on punctuation (specifically dialogue punctuation) and contractions.  They loved to highlight the punctuation on the anchor chart.  They also loved learning how to add dialogue to their own writing and suddenly journal time and writer's workshop were filled with stories that attempted to include the correction punctuation so show when someone was talking.  We also connected dialogue to speech bubbles for our second graders.  We showed them how to take what was in quotation marks and move that to a speech bubble.      
 Both our first and second graders would get a book version of The Five Little Pumpkins.  The first graders would usually add illustrations to the book to make sure the words and the pictures matched.  Our second graders would often have to illustrate and then add speech bubbles to show what was being said.
The possibilities are endless.  You could work on retelling, create a felt board to tell the story, create a new version of the story, hunt for sight words, hunt for contractions, illustrate...Can you see why I tried to change it up each year?  There are so many different activities that you can do with this short poem.  

Do you want to try this with your students?  You are in luck because I have made this book into a freebie for you.  And because I know we each work with different levels and want to do different activities, I created 3 different books.  One has the words and illustrations and just needs to be colored.  The second one has the background and the words and needs the pumpkins added.  The third one just has the text and needs the illustrations added.  I've also included a set of speech bubbles that can be cut and glued onto each page.  Click HERE to download your freebie.  

Here is a little step by step guide for assembling the books.  They are super easy, but I know they can be confusing if you haven't assembled books like this before.  
Print out the pages you need.  They will look like this and you will think that those pages will go next to each other but they actually end up back to back.

Fold the pages in half so that the words and pictures are on the outside.  Crease in the middle.

The crease is now on the left for all the pages.

Flip the pages over and put in order so the creased part is now the right side/outside edge.  

Lay the pages inside the cover.  The creases should be facing the right and the open flaps from the pages are now in the middle at the spine.

Close the cover and staple on the left side.

I hope this helps and gives you an idea you can use this week with your students. Thanks for stopping by the punchbowl!

Sara


3

Parent Teacher Conferences......HELP!!!!

Hey guys! I'm Melinda from Tales of the Sassy Teacher and I am super excited today to write today on the Primary Punchbowl. Today we are going to be talking about Parent Teacher Conferences.


It is that Time of year and I don't know about you but I dread conferences. I get so nervous. I want my parents to feel comfortable to talk but I want to feel comfortable to really chat about what I see happening with in the classroom. 

Let me give you some background on what I do at my school. I am currently teaching math to 3 1st grade classrooms. This means that when I get ready for conferences, I must get information ready for my team so that they can share my thoughts during their time. It makes it more difficult because you have to use others to help you convey your message. 

With that being said, I do a few things that help me to make this time smoother. 

1. I create folders that have all the students graphs from assessments ready to go. 
2. My team member gives me a folder as well with all of her Reading materials in it. 

3. I have a conference summary sheet that is super helpful. I have each team member check off what they need to say and then I report. 
Click HERE

This is very helpful when working with a team of people. If you like this then just click under the picture to grab a copy. You will be able to edit it to fit your needs. 

The form filled out.


Now the other things that I use is some planning sheets that I created for sending reminders to parents that it is that time of year. 


This is completely free. If you would like to download a copy just click HERE!

Well, I hope this will give you some confidences when planning for those conferences. Stop by and check out more post from the Primary Punchbowl. It has been a great pleasure to have spent today with you.


Melinda

1

Candy and the Scientific Method!

Hello all! Once again, welcome to The Primary Punchbowl! I am so very excited to be a part of this inspiring group of women. It is unbelievably humbling to find a group of women that supports one another in the way each of them has done for me and I feel beyond blessed to now be collaborating with them in this new venture!

Today I'm here to talk about my favorite subject to teach, science! There are so many things to love about science instruction. It gets kids talking and working on their collaborative skills. There are so many opportunities for a-ha moments. It can be tied into just about any unit or theme under the sun! So this week, it was all about Candy Science for us!


This week, my team and I introduced our students to the Scientific Method. We have chosen to place extra emphasis on teaching the whole process step-by-step. What better way to get our kiddos involved than with CANDY?! Obviously, it's a huge motivator for everyone. So, today... I'm outlining 2 experiments that my class completed this week. And there may or may not (there will be!) a freebie to pick up at the end! :)

Experiment #1 -- Dancing Raisins
This is an absolute favorite of mine.

Alright... I know that this technically doesn't use candy. I know, I know... but raisins are readily available in our school. Every student is given a free breakfast, snack, and lunch daily... and roughly 3 days a week, that snack is raisins. Now, the kiddos get sick of them pretty quickly, so they love having another use for them (I much prefer this use than the throwing them... stashing them in the backs of desks... and some of the other lovely things our kiddos choose to do with them!).

Here is a quick video from YouTube of just how to complete the experiment.


Side note: For more AWESOME videos of science experiments with kids, search Hoopla Kidz Lab on YouTube! 

What makes this experiment a great choice for introducing the scientific method is that there is really only 1 step to the procedure: put the raisins in the soda.

It's a phenomenal way to teach the 6 steps in the scientific method while completing an engaging experiment! Just look at the focus on my kiddos' faces!


My favorite part is listening to their conversations about why the raisins end up dancing!


Here you can see us doing a Scramble and Discuss activity -- the struggle is real, all. We're a week out from Halloween so I've been pulling this strategy out quite a bit, lately.


Experiment #2 -- Candy Sink/Float
This next experiment doesn't have a nifty video.

And unfortunately, full disclosure here... my phone died this week. And I am a total spaz about the cloud... and therefore, I have no photos of this experiment. :( So for that, I am so sorry!

For this experiment, grab a bag of mixed candy. I prefer the Snickers, Three Muskateers, etc... bag. Then, have your students hypothesize which candies will sink or float. A lot of kiddos will say the same thing for all of the candies. But it's pretty interesting to hear their thoughts on why certain candies sink and others float.

I'll give you a quick run-down of how it plays out.
Those candies with nuts in them... sink
Candies with nougat are more airy and tend to float!

Tasting the candy is an integral part of the investigation, but obviously BE AWARE OF ALLERGIES!

Some of my other FAVORITE candy science experiments are:
  • How can we make a marshmallow sink?
  • Floating M's (or S's in Skittles)
  • Dissolve candy in multiple liquids
  • Soak gummy candies in different liquids
  • Melting speeds of different candies
What are your favorites?

So how do I guide 1st grade students to complete full lab reports in a developmentally appropriate manner? Well, it's all about the interactive notebook!

I created this page and made about a bajillion copies. My plan is to slowly phase out use of it as students master the steps of the scientific method.


I am so sorry that I don't have many photos of this page in action  (see above for my spastic phone issues), but I promise to update this post tomorrow as soon as I get to school. 

To make up for it, I'm offering a freebie! Click HERE to download your own copy! 

What are some of your favorite ways to teach the scientific method?

1

Pumpkin Science

Hey!  It's Andrea from Always Kindergarten.  I'm so glad you stopped by The Primary Punchbowl today.  Teaching science wasn't really my "thing" in my first few years of teaching.  But now I absolutely LOVE to teach science!  

"I have no time," you say.  "It's so much prep," you say.  
Oh, but it's so much fun!

I teach thematically so my science and social studies are embedded in my themes.  This gives me the time to sneak science in with whole group and small group activities.  And yes, as with anything, there's always some prep to do.  But it doesn't have to be a lot.  Kids are curious creatures and love to explore.  That's what science is all about!  

This time of year, we are exploring pumpkins!  I do a pumpkin theme over two weeks in October but it could easily be done in just one.  The prep is minimal.  All you need are a few different pumpkins (many grocery stores will donate the funnier looking pumpkins to teachers!), a tub of water, something to measure with (we use linker cubes), and some carving tools.  

Week 1

Investigating the outside of the pumpkin!

The students begin by talking about the pumpkin and what they notice.  They discuss size, shape, color, texture, temperature, etc.
As all good scientists do, we record our observations and investigation results in our Pumpkin Journals. 

Then we count the ribs (lines) on the outside of the pumpkin and measure how tall it is with linker cubes.

Then comes the real fun!  Will the pumpkin sink or float?!  We always make a prediction before testing it out.


We also learn about the life cycle of a pumpkin.  I love these "Let's Read And Find Out" books for science topics.
 

Week 2

Investigating the inside of the pumpkin!

Students love to get their hands on their learning.  They can't wait to get inside the pumpkin to find out what's in there!  Estimating the number of seeds is always a ton of fun.  It's great for counting to 10 and skip counting.  We use counting mats to help us keep track.

 
It's amazing just how many seeds can be inside a pumpkin!

Last, we work on labeling the parts we see.

After 2 weeks of pumpkin fun, we celebrate by roasting pumpkin seeds!

Want to have some pumpkin fun of your own?  You can find all of the journal pages we used in this unit in my Teachers Pay Teachers store.

What are your favorite pumpkin activities?


2
Powered by Blogger.