It's 212 Degrees!

Whoop-Whoop everyone! 
It's your girl, Elizabeth, from First Grade Stripes
Can I just turn up the heat a little?!  Yes, I can!  :)  

What's the temperature in your classroom?  Not literally, I'm talking about what's your teaching temperature?  Is it 98.6 degrees fahrenheit? How about 100 degrees fahrenheit?  

Well, my teaching temperature is 212 degrees fahrenheit!  What?  I know, it's like a sauna in my classroom since the minute I walk in the door to the minute I leave my classroom!  
Why, 212 degrees?  Well, that's the temperature of boiling water! When I teach, my lesson has to boil.  It has to burn so hot that my kiddies ask for water!  

We have to remember that we are someone's hero EVERYDAY!  We have to put on that cape and dash to infinity and beyond (thanks Buzz Lightyear)! Our profession calls us to action, to be proactive, to make a change, and to make a difference!  We have to remember that every single student in our classroom needs us to be that everyday hero!  We have to teach like there is no tomorrow! 

My belief is that we are all teachers from the heart.  It's not a competition; it's not about which teacher is more popular, it's not about the amount of followers.  

It's about a journey that we triumph together!  Each of our different teaching styles make our classroom unique!  Being different is so awesome sauce!  When we collaborate together, it's like fireworks igniting into the air.  When we unite...
we help change the world, 
we help others see the true essence of teaching, 
we show compassion and kindness, 
we collaborate ideas to help our students
we maximum the field of education
we let others know that we are strong.

Need some inspiration?  Check out this youtube video...
So, get in on the action and DO!  

Our purpose is for each and every child.  Bring a smile to every single face looking at you every.minute.of.the.day! You are the only one that can decide and the only one that can DO!  

You are dynamic! You are awesome! You are loved! 
You are a teacher! 

Turn up the heat in your classroom and make it 212 degrees EVERYDAY!  Print out the little quote and post it as a reminder.

Feel free to show off your 212 degrees teaching on social media using #212degreesclassroom.  
A whoop-whoop shout-out to YOU for being so awesome sauce!  

How do you make your classroom reach 212?  What are your plans to make your classroom 212 degrees everyday?  

Always know that I love you! 


0

5 Quick & Easy Ideas for the 100th Day of School


Hey there, punchbowl friends!  It's Andrea from Always Kindergarten.  Our 100th day of school is quickly approaching and I'm sure many of you are in the same boat.  Some years, I've had all the time in the world to plan and prep engaging activities to celebrate the big day.  However, there have been those years where everything seems to be happening all at once and I have less time to get myself ready.  Here are 5 super fun, low stress, and low prep ideas to make your 100th day celebration memorable for your kiddos!

Writing: When I am 100....
"When I am 100, I will use a cane to walk and I will like to sit."
You can grab the writing paper from my friend, Tara, over at Little Minds at Work!

Art: 100 Pictures
I cut the digits 1-0-0 out using our die cut machine and the students glue them down on the paper and turn them into something else!  The results are super cute!!
If you don't have access to a die cut machine, you can print the numbers out or have students cut them out of magazines.

Math: Race to 100
Students roll a die and add mini linker cubes to the hundreds chart.  The first person to 100, wins!

100th Day Q-Tip Painting
So quick and easy and the kiddos LOVE this!  I set out 10 different colors of paint and students put 10 dots in each section of the paper using a Q-tip!  
You can find this printable from Rebecca Drake Lehtinen & Whitney Ueltzen here.

100 Kisses
A classic!  I use dot labels to number the bottom of the kisses and the kiddos match them to the number on the hundred chart.  You can grab a copy of this simple printable here or by clicking on the picture.


If you're looking for more awesome 100th day activities, check out these great units from some of my Primary Punchbowl friends!

This unit has some more great printables for the 100th day! 
Click here for this unit from my friend, Erin, at Very Perry Classroom.

And how cute is this pirate themed 100th day unit from my friend, Sarah, at Mrs. B's First Grade!?  Check it out here.

Happy 100th Day!


1

12 Ways to Use Task Cards


It's Sara from Sara J Creations and I've got a big love for task cards!  Let me explain to you a bit about task cards and then I've got a freebie for you.

Task cards are all the rage in education right now, but what exactly are they?  Task cards come in a variety of sizes, designs, content areas and formats.  They are usually a set of cards (generally smaller than a piece of paper - think index card sized) that have one problem on each card.  Sometimes these are open ended problems, sometimes these are multiple choice questions, sometimes they have QR codes to scan to check the answer.  And the list goes on and on.


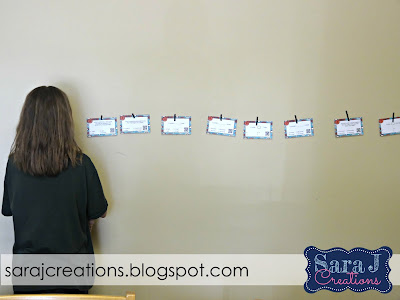
You can make task cards work for you no matter what subject or grade you teach.  I once heard it described as being as simple as taking a worksheet and breaking the problems up so there is one on each card.  Now why go through all that work, right?  Why not just give them a whole worksheet?  Using task cards allows you to differentiate for your students.  You could require a struggling student to complete fewer cards making them less overwhelmed than they would be if they were looking at a worksheet with 30 problems on it.  Often, task cards are displayed around the room causing students to get up and move while working.  How many of your students NEED to get up and move?  This is a perfect way to let that happen while still focusing on learning.


Task cards often need some sort of recording sheet to go with it so students can record their answers.  Usually the task cards are just one set for the whole class and designed to be reused, so the students have to solve the problem on their recording sheet.


Depending on how you are using the cards, you might want answer keys available for students to check their work.  If you have the technology available, try QR code task cards.  After students solve the problem, they scan a QR code on the card to check their own answer.


There are many benefits to using task cards, but the benefit often depends on how you are using the task cards.  I've included 12 ideas for using task cards in your classroom.  Note: There are SO many ways to use task cards, this is by no means a comprehensive list.

1. As a center/station for math centers or math workshop, students work through them at their own pace.  They could either self correct or you could collect it and check their work and perhaps take a score.


2. Problem of the day that they all work on when they first come in or during calendar.  You could project it on an overhead projector/document camera/etc. for the whole class to see and solve.


3. As a preassessment for a unit you haven’t taught yet to see what they know about the topic and a way to group them by ability.  How you use it is up to you - you could use number 1, 6, or 7 but use the results to guide your instruction.


4. As an assessment at the end of a unit - just like the preassessment, you decide how you want to do this (all at the same time, one on one, in small groups, as a game, during a quiet time, etc.) but take the score and assess what they've learned instead of giving a test on the same material 


5. As a review before the end of a unit - these would be perfect to review for an upcoming test in science, math, social studies, reading, etc.


6. As a chance for the class to get up and move – place all over the room and they have to wander and find all the cards and solve.  They can solve them in any order as long as they put the answer in the correct spot on their recording sheet.


7. Use in a game such as Scoot – place a different card on each desk, after a set amount of time, have them move to the next desk and solve that card and then continue moving until they’ve completed all the cards


8. Tape a card on each student (use washi/scrapbooking tape that is easily removed), pair them up and they will work to solve their partner’s problem, then they can move and find a new partner and continue solving.


9. Early finishers can work on solving problems when they finish their other work


10. Interactive bulletin board that they can go up to and work on solving during a set time during the day


11. Sent home as homework - then you can make adjustments about how many problems students are solving based on their abilities and needs.


12. Cut and paste into math journals and solve.  These could make a great problem of the day or opener for a lesson and then they can go back and reference it later when it is stored in a journal.


Did that give you an idea on where to start?  Or maybe you realized you were using task cards without even knowing it.  How do you use task cards in your classroom?


If you want to try out task cards for free, I have two free samples in my store.  The first is a place value set. This freebie includes 16 task cards that cover expanded form, skip counting, base ten blocks and comparing numbers. They are all Common Core Aligned and designed for second grade.


My other free sample is designed for upper elementary and focuses on learning states and capitals.  It includes the states in the West region and comes with a QR code on each card to scan for the answer.  Give task cards a try and let me know what you think!  


I
6

Making the Most of Using Emergent Readers

Hello, Friends! It's Ashley and Brooklynn, authors of the blog, Markers and Mascara

We are so very excited to be back and have the opportunity to talk about one of our most favorite things we use in our classrooms: Emergent Readers!

We have had several questions about how we use emergent readers in our classrooms. 

To start, our students have “Reading Briefcases” to use to hold their readers. Each week, our students are expected to learn 1-2 new sight words. We “use” an emergent reader to help build their knowledge and reading of these words. Our students LOVE getting a new reader on Mondays.

The words to be learned are often in a traceable font to help distinguish them from the other words. *If they are not traceable, we have the students distinguish them in some way (highlight, trace with a marker, etc.). 

One of the first things our students do is “graze” through the book to look for words they don’t know or are not familiar. They look to find this week’s words, as well. If they come to a word they do not know, they underline it. This gives us lots of information: are there too many words they don’t know? Are they unfamiliar with words we’ve already covered? Were they not able to use context/picture clues to help them figure out the word?

Next, the teacher reads through the story, as the students track along. There are times when we have the students echo what we read. 
Because we teach in a Title 1 school with several ELL students, we often discuss the vocabulary of the texts; as well as, the phonetic aspects of “major” words. This is also the time when we talk our way through the book and help one another figure out those words we were unsure of. After that, we give the students opportunities (individually) to read through the reader. We have used phonics phones, echoing microphones, whisper voices, etc. By doing this, we are given the chance to listen to specific students, watch for struggling parts of the story, watch the students’ thoughts about tricky parts, etc. Our favorite is to watch them when they come to something they are unsure of and see how they figure out what they do not know. 


Our students are expected to use resources for a myriad of things...we seldom ever give an answer to a question they can figure out on their own. The same holds true when learning to read. If they “forget” a previous word, they must look back to our sight word resource to find the word (the resource has a picture clue to help "jog" their memory). If they forget a letter’s sound, they must look to the phonics cards for help. At times, they can even ask a group member.

At the very end of a small group session, students may choose to read the book to their peers. We love celebrating when our group members successfully read the book aloud. Sometimes we will choral read the reader together, partner read.  At times, we have been know to read in silly voices or funny accents. 

We hope this gives you some insight as to how we use emergent readers in our small group sessions. There is so much that occurs in small groups. We’d LOVE to hear from you with how you use readers, or even other ideas for them. We’d also love to hear any other things you do during small group.

As we start the 2016 year, we wish you all a very happy, healthy, and successful rest of the school year. May your weekdays be short and your weekends be extra long! ;0) 


0

How to-Writing and Sequencing

Hello friends, I'm Diana from MyDayinK and I am excited to be writing a post for The Primary Punchbowl.  I hope your new year is off to a great start!

The first week back from winter break can always be a little tough.  I find myself having to review rules and expectations and getting my little kiddos back into the kindergarten game.  Once the week is over though I feel like we get more into our groove and our routine runs smoothly again. 

Shortly after we come back from break we begin our next unit in ELA which is all about beginning, middle, end and story elements.  To start our unit we focus on real life sequencing to demonstrate how order is very important and necessary if things are going to make sense.  

This time of year is perfect for sequencing because in Chicago we are in the thick of winter and wearing as many articles of clothing, hats, gloves, scarves, etc.  We practice sequencing by putting on our winter gear.  We talk about how we can't put our boots on and then our snow pants because it doesn't work and it's too hard to pull your pants over your boots.  We also talk about how we can't put our gloves on and then our coats because it is too hard to zip up our coats. 

Another real life example of sequencing that works perfect for this time of year is how to build a snowman.  

Last year it worked out great because we had just gotten a snowfall the week we were doing this activity.  I had parents come in to help and I broke my class into groups of five and we all went outside and built snowmen.  

After we did the authentic application then we came in and talked about it and put it down on paper.  

If the weather cooperates we hope to be able to do this again, otherwise we might have to improvise and create our own snow.  ;)

To help with my How-To Writing over break I created two How-to Writing packets: How to Build a Snowman and How to Make Hot Chocolate and you can enter below for a chance to win both.


a Rafflecopter giveaway

Thank you for taking the time to stop by. 

I hope you have a great start to your year and a wonderful week with your students!
1

After Winter Break Refresher

Hello there! It's Jessi from Wild West by Jessi here again to blog. If you are like me you might be feeling a little sad knowing you go back to school soon. I start back in the classroom with students on Monday, January 4, 2016. Makes me a little sad to think I have just over a day left on break! I'm also in sort of a panic mode as when we return on Monday, we will only have 90 days left of our school year. Yes, 90 days! Our school year is officially half way over and in the books. We have SOOOO much left to cover and teach with just 90 days left.


With the start of school right around the corner again and the students being off for several weeks it's the perfect time to refresh the routines and procedures of the classroom. Here are a few pointers and suggestions of things to review with your students as you return back to school from break...

* How to line up before going to the classroom.
* How to unpack for the day (If your students hang their backpacks out in the hallway.)
* How to enter the classroom.
* Morning routine (bell work, ordering lunch, etc...)
* Where notes from home belong.
* Where to turn in bell work.
* Make-up assignments.
* How you handle assignments for when the student is absent.
* Handling of school supplies and materials.
* Collecting materials.
* Bathroom procedures- signing out, signing back into the classroom etc...
* What to do when you are finished with an assignment.
* Getting a drink of water procedure/ water bottle procedure.
* Homework, late work, missing assignments, etc...
* How misbehaviors will be handled.
* Positive behavior reinforcement.
* When it's appropriate to take an AR Test.
* What to do for a Fire Drill, Lockdown, etc...
* Recess behavior and expectations.

Just like the first few weeks of school after summer is over and the students have come back you'll want to spend the first week if not the first two weeks reviewing and modeling everything again. The students will need the refresher and you'll be thankful you spent time again reviewing your procedures and routines in your classroom. Reviewing the procedures and routines will help get the class as a whole refocused and energized to take on the second half of the school year.

I hope this helps to refresh what procedures and routines you might need to refresh not only yourself on but also the kids. I hope everyone has had a restful winter break and has a wonderful rest of your school year!

Until next time,
-Jessi
0
Powered by Blogger.