Creating Peace Through Peace Talks


Hello!
I'm Joya from Live Love Serve Teach blogging today about creating peace in the classroom.  This time of year gets crazy, hectic, chaotic, and just plain busy.  Students are busy at home and at school.  The holidays also bring out lots of different emotions in kids based on their experiences.  Peace can be hard to find and maintain in the classroom.  I'm here to share about Peace Talks and how they can help.

I got this idea from the book Solving Thorny Behavior Problems by Caltha Crowe.  This book is part of the Responsive Classroom method.  Have you heard about Responsive Classroom?  If not, click here for a general overview.  I'm a huge fan and used Responsive Classroom for over 12 years in my teaching.

Peace Talks in the Classroom

First:  Students need to cool off.  No one is going to be able to solve any problems in the heat of the moment.  I used a quiet corner in my room that had comfy pillows for students who needed to cool off.  My son's Montessori teachers use a Peace Table.  It is in front of a mirror.  There are 2 seats at the table.  There is a plant, an electric candle, and a sensory bottle.  My son is 4 so this is what a table would look like in a preschool/kindergarten classroom.

Need ideas for sensory bottles?  Pinterest has tons.  Click here for some inspiration.

Next:  The child who has been hurt/teased/etc... comes up with an I Statement and asks the other child (the offender) for a peace talk.  Example:  "I didn't like it when you pushed me.  It felt scary.  Will you please join me for a peace talk?"

Where peace talks happen are up to you.  Design a peace corner, peace table, whatever works in your classroom.

Second child needs to share his or her understanding of what was said.  "I heard you say you felt scared when you were pushed".  Or kids would say something like this: "I heard you say I didn't like it when you pushed me.  I felt scared."  Sometimes it's easier to teach them to repeat exactly what they heard.  Then that child gets to share their "side of the story" or what they think happened.  It is important to try and have the second child first state what he/she heard then state their point of view.  Otherwise you end up with more arguing.  

The children continue sharing what they heard and their point of view until both feel that they have been heard and understood.

Then:  The students work together to brainstorm possible solutions.  Two young children are not going to magically brainstorm solutions.  This is where a peace talk anchor chart is very helpful.  I had one that stated the steps in a peace talk and one that listed common solutions to common problems.

Finally:  Students choose one of the solutions.  They both have to agree on the solution.  Once there is agreement students shake hands to "seal the agreement".  As a first and second grade teacher for 15 years I usually helped the students follow through on their solutions and make sure both parties were satisfied.  :)


This process takes time and some intentional teaching but is soooo powerful.  I hope you decide to try peace talks in your room.  Let me know how it goes.  Share questions, success stories, and struggles below in the comments.

Wishing you a "peaceful" December!
Joya :)
 
3

Classroom Management - in December?!

Hi there! It's Chris from The Scoop in Second Grade here. I'm blogging over here today to talk about how I'm going to try to manage the CrAzY during these upcoming weeks before Christmas.

By now, everyone is either on a much deserved Thanksgiving Break or has one more long, treacherous day ahead of them. I walked out of school today with a feeling of relief.  We made it these past two days unscathed.  My room is ready {mostly} for December and I can relax for the next five days. FIVE DAYS. They will go by in the blink of an eye. Therefore, I need to have a game plan in place for when we return.

Monday will be the last day of November which means the crazy days of December will be upon us. There is so much fun to be had during these three weeks before Winter Break.  However, the potential craziness is always there.  Hence, the game plan.

So many of you have wonderful classroom management procedures in place but even the most seamless plans need tweaking during this time of the year.  This year, I am not - I repeat, NOT going to invite that pesky Elf  into my classroom.  I know. I know. That is probably sinful to some of you reading this right now.  I have tried. Really tried. Over the past several years to make the Elf feel comfortable in my classroom. I've allowed him to write on our white board, play with our manipulatives, even hang from the ceiling.  But, this causes me a lot of high anxiety people. I know it is supposed to be fun, exciting, and magical.  But, to me, it is stressful! So this year, he is not invited.  I'm not sure if my students this year will be looking for him or not. I am in a different building in my district and after talking with my teaching partners, they do NOT invite him either. Whew! Maybe no one will even notice;)

Anyway, here is what I am going to try this year.  The Secret Student.  I created a Secret Student sign that will hang on my white board.  Each day I will randomly choose a student and write their name behind the sign on my white board where no one would be able to see.  They will know that I am watching all of their behavior, all day long.  At the end of the day, I will reveal the name behind the sign.  If that student has had a great behavior day, they will receive a Secret Student Brag Tag.  I just started using Brag Tags this year and let me tell you, my students LOVE them!  Let's be honest, I already bought Christmas pencils from the dollar store as well.  I am hoping this gives everyone a little incentive to do their very best.  It will almost be like the big fella in the red suit is watching...I will have to come back and let you know how it goes!  

If you would like to try this as well, click on the picture below to download my freebie!


That's all for now! I plan on sitting back and catching up on Netflix, start a little Christmas online shopping and getting the holiday decor out over the next five days.  I hope you and your families have a wonderful Thanksgiving together! Until next time!

Chris
1

Do you Dojo?

Have you heard of Class Dojo?  Well, this is the first year that I use it and can I just say how much I love it!  I love it!  :) 

Class Dojo is a great behavior management system for your classroom.  Students earn points for positive classroom behavior and may also lose points.  One cool feature is that parents have access to their child's account and they are able to read their child's report.  To make you smile even more, teachers can see the dates and the number of times parents login to view their child's report. You can also post pics of your classroom on the page's class story and send and receive messages to and from parents.  I know, this sounds great! So let me begin...

You can create your FREE account by visiting Class Dojo.  No need to worry if you haven't used it, you can take a tour of the site and practice with a generated class demo on Class Dojo.  After you login, you can create your class by selecting that feature on your dashboard.  

Enter your basic class info, students' name (and you will see a Dojo assigned to the student, you can change it later).  A generated parent letter is automatically downloaded for you and you can directly invite your parents by inserting their email address.  Class Dojo has already the selected behaviors and you can add your own behaviors by selecting the plus sign.  For example, I added walking in line and weekly winning table as some other ways for the students to be able to earn points.  


Now for the fun part... You can award points to the whole class by selecting whole class and clicking on the point(s). Make sure to have the volume all the way up so you can see your kiddies faces when they hear the chime! :) You can assign or remove points to the whole class or selected students.  Just make sure to take attendance first before assigning points.  

On the bottom of your class, you will see where you can take attendance, award multiple students, have Class Dojo pick random students, and there is even a timer!  Wow!  I use the timer all the time and it works magic! 
The settings feature on the top of your class page is important because you can select to edit your class, connect parents and students, reset the bubbles, and choose your display settings. Click connect parents to send a personalized code to each parent so they may have access to their child's report. You can also download the PDF file and send it home. If you teach older students, you can also send them their personalized invite so they can keep track of their own progress.

You can click on View Reports to see a class report and/or individual report.  This is a great visual and print out you can save and use for parent conferences.  I use this print out to justify the students' conduct grade on their progress report and report card.  This is the same report parents and students see in their own dashboard, so everyone is connected.  

There are so many things I love about this program.  One of my favorites is having concrete evidence of the students' conduct so there are no questions about their conduct grade.  The report says it all!

The Class Story features is where you can post messages, reminders, dates, and even class pictures. Super cool and safe! Remember, parents need their individualized parent code to view only their child's report, so you can post with security! :)  
I also use Class Dojo to send and receive private messages from parents.  It's like having parents text you, but without giving out your phone number!  
And guess what else?  You can just download the FREE app on your phone and have access to Class Dojo on the go.  My kiddies love to look at my phone to check out their Dojo and they get really quiet to hear their fav chime!  I really like this app because when we are walking in the hallway, even out on a field trip, I just assign the students points right away.  When another adult gives us a compliment, I also give points to the class for doing the right thing! :)  

I like to set point goals in increments of 50.  For now, our goal is to get to 50 for a class popcorn party.  I have other treats lined up, like having a picnic lunch with me, taking off our shoes in class and walking around in socks, having a special dessert, having extra recess time, etc...  

My next goal is to create a Class Dojo wall.  Not sure about all of the details, but I'm working on it. You know, on our 1,001 items to do! 

Recently, I received an email from Class Dojo that I've been selected as my school's Class Dojo mentor!  I'm still excited and I received that email a week ago! :) Would you like to be a mentor too? Are you a mentor now? 

So do you Dojo?  Have you heard of it?  What do you think?
I would love to read about your ideas!
~Elizabeth from First Grade Stripes 


0

Making a Jeopardy Game Using PowerPoint!

Hey y'all! Brogan here from Brogan's Bits! I am so excited to make my official first post on The Primary Punchbowl. I love these ladies and I am so excited to get a chance to work and collaborate with them! 

I'm going to make a shout out to all the tech/PowerPoint guru's for this blogpost. I seriously love everything PowerPoint related. I do not know what I would do without PowerPoint and use it ALL the time in my own classroom! I love learning new ways to use it and was thrilled when I found this awesome quick trick! 

So, I will be honest. I originally started this post to teach you how to make your own jeopardy game. However, I found a template that makes it so much easier and I thought.. "We are teachers. Who wouldn't love a quick plug and play Jeopardy game?!". That being said, I quickly changed the tune of this blog post. 

If you go to Educational Technology Network and scroll down to the bottom of the page, you will find several downloadable templates for a jeopardy game! I downloaded the "Basic Jeopardy Template" which looks like this: 


Now, from here on out it's pretty explanatory. If you are obsessed with making things look cutesy (like I am!) then you can play around with changing the background and fonts. The next step is to start plugging in questions and answers to the slides. The slides go in order (starting on slide 3) for Topic 1 Question 1 (where you will type in the first question for that topic). The next slide (slide 4) will be the "answer slide" for the previous question. In the bottom right corner of the answer slide you will see a small house button. If you click that it will take you back to the main page with the Jeopardy table. Once you fill in all of your questions and answers you are ready to play! Seriously, it is that easy! All the question pages are linked to the Jeopardy table page on the number values. So, if you have the table pulled up (which looks like this): 


and you click on the "10" under topic 1 it will lead you to the question you have typed in for that topic/value. 

If you are interested in making your own Jeopardy game, click here for a fantastic tutorial. I hope you find this helpful in your own classroom! I know I love using this for quick assessment or review on my Promethean Board. 

Hope all of you are having the most fantastic year! Thanks for stopping by! 

-Brogan


2

Alphabet Apps for the Primary Classroom


Hey!  It's Andrea from Always Kindergarten.  I absolutely LOVE using technology in the classroom.  I am lucky enough to have an administrator that embraces new technology and a PTA that supports us with the funding to keep things as up to date as possible.  
I started using iPads in my Kindergarten classroom 4 years ago.  I have a set of 5 of them and we use them all day long.  At first, I was overwhelmed by the sheer number of apps out there.  It's so hard to know which are the best to use in the classroom.  In the beginning, it was trial and error and I definitely downloaded some doozies! But over the last few years, I have found some great ones that work well for my students.  

Here are some of my favorites for letter names and sounds!
Starfall ABC's is great for focusing on one letter and it's sound at a time.  And the best news...it's FREE!  My Kinders love the silly songs and activities within each letter.
iTunes               Google Play

Eggy Alphabet is a paid app ($1.99) on iTunes and totally worth the money.  And it's FREE on Google Play! There are two games within this app.  The first focuses on letter formation and there are 4 different activities.  The second focuses on letter sounds.
iTunes               Google Play

Who doesn't love Lakeshore Learning!?!  All About Letters Interactive Activities focuses on both letter formation as well as letter sounds.  The activities for each letter are the same so kiddos can complete them independently.  This app is $1.99.

Another awesome FREE app for letter identification!  ABC Ninja calls out a letter and the kids swipe that letter.  You can change the difficulty as well as choose the letters and sounds included in the game.  Its super easy to differentiate for each student.

Quite possibly one of my absolute favorites is Touchtronic ABC's!  Students use these Touchtronic Letters on the iPad to match letters to sounds.  My kinders love them!  The best part is that this app is FREE!

What are your favorite apps for the classroom?
Leave them in the comments below!


0

Expanding Your Library in the Classroom or at Home

Hello! This is Jennifer Hamilton from A Dab of Glue Will Do. I am so excited to be writing my first post with the amazing ladies at the Primary Punchbowl. I hope you find this post helpful in growing your library in the classroom or at home. 

It is so important for your child(ren) to be surrounded by books from an early age. There are countless studies that show the benefits of reading to your child (or having them read to you) at least twenty minutes a day. It can quickly become expensive to provide your child(ren) with an extensive book collection in the classroom or at home, but thankfully, there are plenty of cost effective ways that allow you to do this on a budget and save some money.

Ebay
When I was teaching, this was a quick and easy way to build my classroom library. There are so many options on eBay and you can find some incredible deals too. When looking on Ebay, I always preferred to search for bulk children books. This is where you would get several books at once. If you type "bulk children's books" in the search bar and an endless number of entries would appear. What I liked about this option, is that I could get a whole bunch of books for cheap and all at once. Some came to me written in or not in the best shape, but in the main, they were perfect and do the job.

Half Price Books
We are very lucky to have several of these locations in the metroplex. They have so many children's books that are gently used for great prices. You can purchase these books for significantly cheaper than what you would pay brand new at the store. This was my second favorite place to go when building my classroom library. What is great about here, is that you can inspect the books in person before purchasing so you will not receive any surprises about books not being in the said condition. You can also bring your own books, that your kids have outread and sell them to the store to receive a store credit. This allows you and your children the opportunity to have new books rotating in from time to time. To find the closest Half Price Books to where you live, click {here}.

Garage Sales
This is a great way to cheaply build your book collection at home. When you are out on the weekends running errands or going for a walk, keep your eye out for garage sales. You can easily find some amazing deals at garage sales and like at Half Price Books, you can inspect the books in person so you know exactly what you are getting.

Dollar Tree, Dollar Spot (Target), and the Dollar Store
These three places can very much be hit and miss, but when it is a hit, you are in luck. If you check back from time to time you will eventually find some great books for your child(ren).  I have had the most luck with Dollar Tree on finding good books for students and for my girls. They are great because they are $1. You cannot beat that! Little kids can easily tear up books and it not nearly as painful when you only pay $1 for them.

Amazon
Amazon Prime makes life SO easy. If I ever need anything, I can order on there and know that it will arrive at my doorstep within two days. You cannot beat that! Amazon also has some great deals on children's books. What I also really like about Amazon is that you can read the reviews that previous purchasers have written. This can be incredibly helpful when there is such an overwhelming amount of options.

Barnes and Noble
The tried and true method. If I am honest, I do not go here nearly as much as I used to, but sometimes it is fun to take your children to an actual bookstore and let them explore and choose out books for themselves. Many of the local Barnes and Noble stores offer story time or activity time for little kids. 

Library
The library offers books to children of all ages for free, assuming you have a library card. This is a great alternative if you do not want to invest money and still want your child to have a variety of books to choose from day to day. You can pick one or two days during the week that your family can make a trip to the library and choose a handful of books. Once they are all read or on a designated day, the books can be returned and new books can be chosen. 


I hope that this gave you some good ideas for how to build a book collection in the classroom or at home for your child(ren). Where is your go-to place when purchasing books?
2

5 Time Saving Tips for Powerpoint

Hi Everyone, Sara here from Sara J Creations with some time saving tips for Powerpoint.  Do you use Powerpoint?  I made the move to Powerpoint when I started on TpT and learned about the awesomeness of this little program.  I always thought Powerpoint was for creating a presentation or slide show.  Wrong, wrong, wrong.  Yes, it can be used for that, but it can be used for so much more.  When I was in the classroom, Word was my go to program.  I created worksheets, notes to parents, newsletters, and more.  And now I just sit back and wish I had all those hours back where I fought with word to format a picture exactly like I wanted or create a new page identical to one I've already used.  Enter Powerpoint!

I have 5 tips for saving time on Powerpoint.  Whether you are new to Powerpoint, have been using it for years, create and sell products for TpT, or design for your own classroom or house, these tips are for you!

Just a note: I use Windows 10 (I'm still getting used to it) and recently updated to Powerpoint (Office) 2013.  Your program might look a little different than mine depending on what versions you use.

When you open Powerpoint, the slide that automatically pops up is designed for a slide show on your computer.  I found myself constantly changing the slide size to print on standard paper.  This step was driving me nuts each time I created something.  Here's how to solve that - create templates of the sizes you use the most.

Under slide size, choose the size that you use frequently (for me it was 8.5"x 11") and just keep the slide blank.

Go to File > Save As and switch the file type to PowerPoint Template.  It will automatically save this to your documents in a folder called Custom Office Templates.
I have a vertical template, horizontal template, square template, brag tag template and task card template.  Now, I don't have to start from scratch.  I open the template for the product I want to create and it is already formatted for me, no need to adjust the slide size.
Have you ever seen that paint brush in the corner of the home screen?  This is on Word, too.  That is a format painter and I remember learning about this in my computer class in high school and it is a feature I've used ever since. 


Let's say you format a text (meaning you picked the font, size and spacing) and you want something else that you type to look the same way.  In my example above, I wanted Alternate Uses to look just like Directions for Use to keep it consistent on the page.  I could highlight Alternate Uses and go up and change the font, size and spacing by myself by using Directions For Use to help me with remembering what numbers.  Or I can use the format painter.

Highlight the text that you want it to look like, so in this case Directions For Use.  Then double click on the format painter.


While the format painter is selected, highlight the text you want changed.  It will automatically switch it so that it is formatted the exact same way that your original text that you selected was formatted.  No need to remember what font you used, how big it was, if you made it bold, if you left justified it, etc.  The format painter will do it all for you.
Confession : I read about this tip on TpT (in the forums) and updated to Microsoft Office 2013 just for this feature.  I had 2010 before and it wasn't available in that version.  I HATE change.  Updating any sort of technology makes me cringe.  I hate getting used to something new.  But I did, just so I could use this next tip I'm going to show you.

Have you ever tried to match the color of text that you are using to something else in your document like clip art, a logo, digital paper, picture, etc.?  I was doing this a lot to match things to the color of my blog.  I would just pick something that looked close.  Well, with the eye dropper tool, it does all the work for you and the color is an exact match.  

Let's say that you wanted your text to match some clip art like in the example below.  
Insert the picture that you are using.  Then, highlight the text that you want to color.  Go to the Format tab and click text fill.  Then select eyedropper.
You will get a little eye dropper and a square that shows up close the color that the dropper is pointing to.  It will also give you the specific numbers and letters for the color if you need it (but you don't for this trick.)  Click once you've found the color you want.
Your text now matches the clip art!!

Another way that I love to use this trick is when I am starting something from scratch and I'm trying to figure out what colors to use.  I have a Pinterest board called Color Combinations where I save different color palettes that I like.
If I want to make the text or background in my product using the color schemes I saved, it is easy!  Just open up the board, and click on the pin that you want.
When you get to this screen, right click on the image and click copy image.
Then go back to your Powerpoint document and paste the image.
Use the same steps as above to use the eye dropper to select each of the colors you want to use.  If you need to repeat a color, it should show up in your recent colors so you really only need to use the eye dropper once for each color if you keep the document open.
Just delete the Pinterest image from your document when you are done.  I love using this tool because I don't often think of color combinations like this on my own and there are so many colors out there beyond the standard colors that are on the Powerpoint list.  This helps me to narrow down what I want to use.

This tip is for replacing the fonts in your text.  Let's say you have pages of work and realize the font doesn't look right.  Or maybe it is something you created a while ago and the font is outdated.  You could go page by page, highlight the text and then change it.  Or you could use the Replace Fonts feature.
In the home tab, on the far right there is a Replace button.  Click that, then click Replace fonts.
Under Replace there will be a drop down menu with all of the fonts that are in your document.  Select the one you want to change.  
Then for the part that says With: you will select the new fonts from the drop down menu.  That menu includes all fonts that are installed on your computer.  Click Replace.
All the fonts in your entire document will be changed to your newly selected font without you having to go page by page.

Another way to use the Replace feature is if you want to change certain words throughout the text.  The one time I really use this is to change the date.  Sometimes when I'm creating a product, I use an older product to get me set up and then change the content.  I put my copyright information on every page and include the year.  So I might have a new product that I just created but it was similar to an older product so I used the old version as my template.  Now all of my dates say 2014 instead of 2015.
Go to Replace again and use Replace instead of Replace Fonts.
Type in what the text currently says (2014) and what you want it to say (2015).  You can click Find Next if you want it to go page by page and show you the change before it replaces it.  This would be helpful if you didn't want to replace every word in the text, only certain ones.  Or you can click Replace All which is what I do because I know that I want every date in my product, whether in my cover or my footer at the bottom, to say 2015.
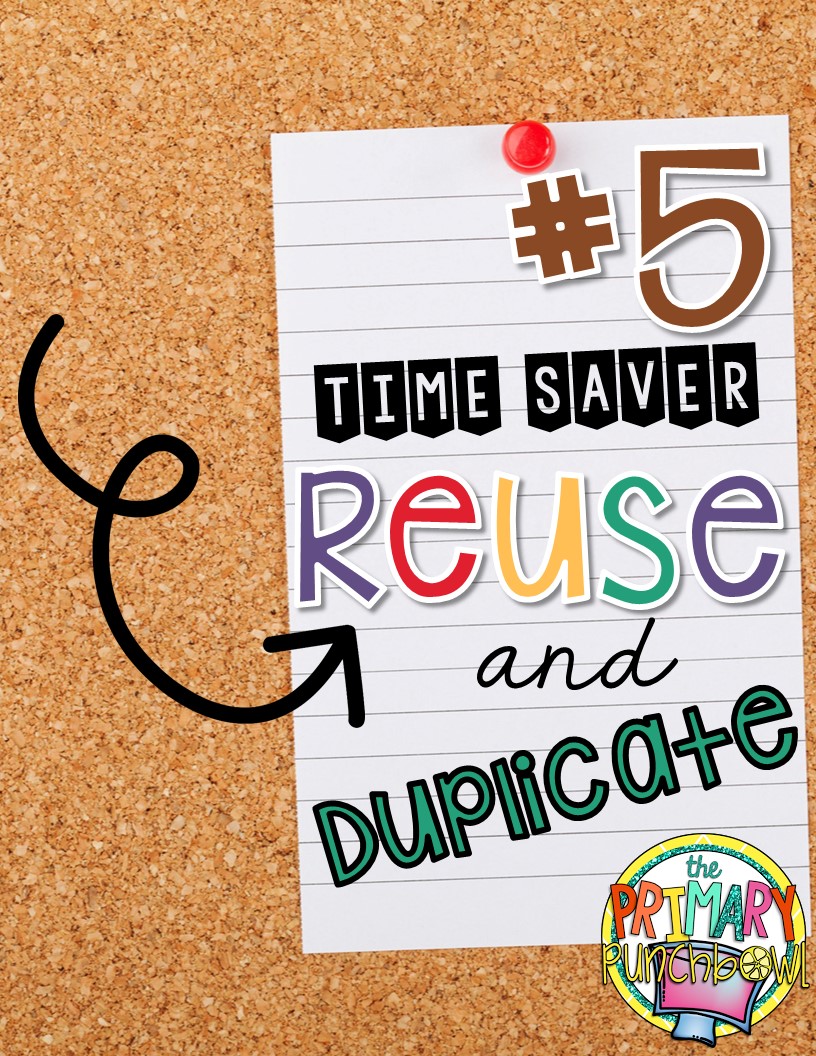
Have you ever wanted to reuse a slide that you already created or parts from a different document?  You could open both screens and cut and paste, but there is an easier way.  Reuse slides!!


Under the Home tab, click New Slide and then go down to the bottom and choose Reuse Slides.

On the right side, it will show you frequently used documents but you can also click browse and go find the document you are looking for.  I like to do this with my terms of use/thank you page because it is something I add to each document and there are a lot of parts and formatting so I wouldn't want to cut and paste it all.
Once you've selected the document you want to open, all of the slides in the document will open.  Find the one you want and click on it.  BUT before you do that, make sure that the box that says Keep Source Formatting is checked.  If not, you might lose some of your formatting like the background.
An exact copy of that slide is now in the document.  It is just like the other slides, you can still move it and change it and it will not change the original document it came from.

Another similar feature is the Duplicate Selected Slides feature.  This is if you want to use a slide again but it is in the same product.  I like to do this when I am making task cards.  I spend a lot of time getting the background, clip art and text just right and I don't want to have to do that for each page of cards.  Plus I want to make sure they are all exactly the same.
To get a copy, go to Home then find New Slide and then go down to Duplicate Selected Slides.  Now that same slide will appear again.
You just have to change the text that is on it.  I start by changing the numbers and then change the text on each card.

Wow!  Did you catch all of that?  Hopefully, this helped you and you learned a few new tricks to speed up your work time.  What tip was new to you that you are going to try out soon?
14
Powered by Blogger.