Showing posts with label Sara J Creations. Show all posts

Thanks for helping me grow gift tags


Easy budget friendly thank you presents!  Thanks for helping me grow with a version that says we as well.  Free gift tags to go with the plants/flowers of your choice.

As the school year is winding down, that means it is time to start thinking about gift ideas.  I blogged about some budget friendly gifts for students with free tags that you can find HERE.  Today, I'm thinking about gifts to thank teachers.  I came up with these gifts for my daughter's Sunday school teachers at our church.  There are 8 teachers and helpers that rotate throughout the year so I wanted to get something small and budget friendly for all of them.  These would be perfect for your child to give to a teacher with the "Thanks for helping me grow" version.  You could also use this idea and the included tags to thank parapros, secretaries, custodians, specials teachers, volunteers or anyone who has helped your students if you use the "Thanks for helping us grow" tags.
Easy budget friendly thank you presents!  Thanks for helping me grow with a version that says we as well.  Free gift tags to go with the plants/flowers of your choice.

To make these gifts, I bought 6 inch clay pots from Home Depot for around $1 each.  I had my daughter help me paint them with acrylic paints that I had on hand.  It took several coats to get the color as dark as I wanted, so I did the rest of the coats after my daughter helped with the first one.
Easy budget friendly thank you presents!  Thanks for helping me grow with a version that says we as well.  Free gift tags to go with the plants/flowers of your choice.
Luckily, this paint dries fast so I was able to paint multiple coats and get it done in one morning.  Once the bottoms were painted, I painted gold around the top a few times.
Easy budget friendly thank you presents!  Thanks for helping me grow with a version that says we as well.  Free gift tags to go with the plants/flowers of your choice.

Next, I bought some succulents to add to the pots.  I bought a bunch of succulents last year for our garden and I love them since they survive on very little water.  I had it in my head that I wanted to use succulents for this project.  I didn't realize that these would be hard to find (5 stores) and would be around $5 for each plant.  Luckily, I found a multi pack that I split up and then bought  4 additional plants to help fill in the space.  The cost and availability might be different depending on where you live.  If you want to go with a cheaper and more colorful route, buy some flowers and plant them in the pots.
Easy budget friendly thank you presents!  Thanks for helping me grow with a version that says we as well.  Free gift tags to go with the plants/flowers of your choice.

Once the pots were ready to go, I created little cards to go with them.  My daughter is just learning to write letters and words so I knew it was going to be a lot for her to write this on each card.  I figured I would just make a printable and she could add her name and I would write the teachers' names.  She also wanted to draw a picture for each teacher so I let her do that and we will add that with some washi tape right before we give them.  To attach the cards, I used skewer sticks that I had on hand and taped them to the back of the cards.
Easy budget friendly thank you presents!  Thanks for helping me grow with a version that says we as well.  Free gift tags to go with the plants/flowers of your choice.

This is a super easy gift idea.  You can make it even easier by not painting the pots or by just tying a ribbon around the pot for some color.  You could also use cute washi tape and just tape the cards to the pot instead of using sticks.
Easy budget friendly thank you presents!  Thanks for helping me grow with a version that says we as well.  Free gift tags to go with the plants/flowers of your choice.

If you want to try this out, I've included the cards (both the ME and the US versions) HERE for you to download.
Easy budget friendly thank you presents!  Thanks for helping me grow with a version that says we as well.  Free gift tags to go with the plants/flowers of your choice.
If you use these cards and post on social media, I'd love to see what you pair them with.  Tag me (@sarajcreations) and The Primary Punchbowl (@theprimarypunchbowl) on Instagram.


0

Why I Love Using Tailwind For My Business


I have been obsessed with Pinterest since I first started using it 5 or so years ago.  Like back when you had to get an invite to sign up. Do you remember that?  I've used it personally for recipes, craft ideas and home decor ideas.  When I started using it for business, it was a different ballgame.  It was no longer just finding pins that I loved and pinning them to a relevant board.  Suddenly I was worried about collaborative boards, peak times, smart feeds, algorithms and analytics.  It started to become stressful and take some of the fun out of Pinterest for me.  If you own a small business (TpT store, Etsy store, etc.), you know how important Pinterest is for marketing and getting your products out there, but there is more to it than just pinning your products.  Last spring, I discovered the website Tailwind.  Tailwind is a pin scheduler and it also gives a lot of analytics about your account.  Let me explain why I love Tailwind so much.


1. The customer service is fantastic.

When I first discovered this company and heard about other TpTers that were using it, I was intrigued.  I hadn't really taken the plunge and signed up or maybe I had just signed up for a trial, when I first contacted the company.  I took a shot and asked them for a donation to our Vegas meetup for Full Time TpTers/Work at Home Moms.  Imagine my shock when the president emailed me back saying he'd love to help and wanted to talk to me on the phone.  I spent 45 minutes on the phone with president of Tailwind not only explaining our group and why were were meeting up and what their donations would be used for, but also explaining our needs as TpTers as far as Pinterest was concerned.  Based on their incredible generosity and their genuine desire to help our community, I was completely sold and signed up for a paid account right away.  Their customer service continues to impress me.  They love to hear from their clients and respond very quickly.  You can email them or start a chat on the websit through your dashboard.  I went back and forth with one of their employees a few days ago and she was responding to my questions within the hour (usually faster) with detailed and thoughtful responses.  I found out exactly what I needed without having to wait around forever to hear back from them.


2.  I can pin daily without having to be online daily.

When you are pinning for fun on Pinterest, you can go on whenever you want, whenever you have time, whenever you are bored.  However, it is a different ballgame when you are pinning for business.  You need to pin regularly and consistently to get your pins seen.  As much as I love Pinterest, I know I don't have the time to be on it daily especially at peak times which I hear is around dinner time and into the evening.  Umm hold on kids, mommy can't make dinner right now because I need to pin some things first.  Ha.  Yeah right.  That isn't an option.  With scheduling my pins through Tailwind, I can schedule them out ahead of time (I currently have my pins scheduled for the entire month) so that they pin at peak times to make them more visible to my target audience.  I still go on Pinterest at other times for fun, if I'm looking for something specific or to save some pins to schedule later, but there is no pressure to pin daily now.


3.  Tailwind tells me my optimized times for pinning.

When you first start your account with Tailwind, they analyze your Pinterest account.  Part of that analysis is determining who your target audience is (who is repinning your pins) and when they are the most active.  This is crucial because then the people you want to see your pins are actually seeing your pins.  What a concept!!  Things have changed a bit with the smart feed changes in the algorithm as far as what your followers are seeing, but it is still important to be pinning when your audience is pinning.  Obviously it would be easy for me to pin during naptime but most teachers are at work and most moms are busy with their kids during the day, so my target audience isn't on Pinterest seeing my pins at that point.  Tailwind suggests ideal times for you to pin each day and you can select as many or as few as you want to add to your schedule.

4.  Tailwind gives me a lot of analytics and insights into my Pinterest account.  

I will have to admit that this is the feature I use the least on Tailwind.  I like to check into my numbers on my various social media accounts but I don't have time to dig deeply. Now I have the option with Tailwind if I want it.  One of my favorite insights that they give me is my progress for the past seven days.  They will tell me how many followers and repins I got in the past week and then they will tell me if that is above or below what I've been averaging weekly.  


5.  I've been gaining more followers and getting more repins since starting Tailwind.

Now I'm not a Pinterest rockstar by any means.  I don't have a ton of followers or repins but I have been growing.  I kept my weekly stats before Tailwind and you can clearly see when I started because I was gaining more followers each week than I ever have before.  I really think it goes back to my target audience being active while my pins are being pinned.

I could probably go on and on about Tailwind.  I know that it can be sort of overwhelming when you first get started.  I am helping a friend get started on Tailwind and it got me thinking - if she needs help and has questions, I'm sure there are others who have the same needs, so I decided to write a blog post.  Because I feel like there is a lot to explain but I want to break it into smaller chunks, I decided to do a series of blog posts starting next week on my blog Sara J Creations.  If you have any specific questions that you want me to address, leave them below in the comments.  If you want to try out Tailwind and get your account set up and ready for my how to series next week, you can sign up for a free month trial by clicking HERE. (Full disclosure - that is an affiliate link that gets you the free month.)  I started with the free trial so I could play around with the site and see if it made a difference in my Pinterest schedule.  I don't think I even lasted the full month before I signed up for a paid subscription.  Let me know what questions you have about Tailwind that I can try to answer for you.      
0

12 Ways to Use Task Cards


It's Sara from Sara J Creations and I've got a big love for task cards!  Let me explain to you a bit about task cards and then I've got a freebie for you.

Task cards are all the rage in education right now, but what exactly are they?  Task cards come in a variety of sizes, designs, content areas and formats.  They are usually a set of cards (generally smaller than a piece of paper - think index card sized) that have one problem on each card.  Sometimes these are open ended problems, sometimes these are multiple choice questions, sometimes they have QR codes to scan to check the answer.  And the list goes on and on.


You can make task cards work for you no matter what subject or grade you teach.  I once heard it described as being as simple as taking a worksheet and breaking the problems up so there is one on each card.  Now why go through all that work, right?  Why not just give them a whole worksheet?  Using task cards allows you to differentiate for your students.  You could require a struggling student to complete fewer cards making them less overwhelmed than they would be if they were looking at a worksheet with 30 problems on it.  Often, task cards are displayed around the room causing students to get up and move while working.  How many of your students NEED to get up and move?  This is a perfect way to let that happen while still focusing on learning.


Task cards often need some sort of recording sheet to go with it so students can record their answers.  Usually the task cards are just one set for the whole class and designed to be reused, so the students have to solve the problem on their recording sheet.


Depending on how you are using the cards, you might want answer keys available for students to check their work.  If you have the technology available, try QR code task cards.  After students solve the problem, they scan a QR code on the card to check their own answer.


There are many benefits to using task cards, but the benefit often depends on how you are using the task cards.  I've included 12 ideas for using task cards in your classroom.  Note: There are SO many ways to use task cards, this is by no means a comprehensive list.

1. As a center/station for math centers or math workshop, students work through them at their own pace.  They could either self correct or you could collect it and check their work and perhaps take a score.


2. Problem of the day that they all work on when they first come in or during calendar.  You could project it on an overhead projector/document camera/etc. for the whole class to see and solve.


3. As a preassessment for a unit you haven’t taught yet to see what they know about the topic and a way to group them by ability.  How you use it is up to you - you could use number 1, 6, or 7 but use the results to guide your instruction.


4. As an assessment at the end of a unit - just like the preassessment, you decide how you want to do this (all at the same time, one on one, in small groups, as a game, during a quiet time, etc.) but take the score and assess what they've learned instead of giving a test on the same material 


5. As a review before the end of a unit - these would be perfect to review for an upcoming test in science, math, social studies, reading, etc.


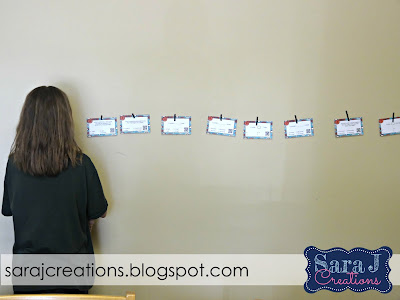
6. As a chance for the class to get up and move – place all over the room and they have to wander and find all the cards and solve.  They can solve them in any order as long as they put the answer in the correct spot on their recording sheet.


7. Use in a game such as Scoot – place a different card on each desk, after a set amount of time, have them move to the next desk and solve that card and then continue moving until they’ve completed all the cards


8. Tape a card on each student (use washi/scrapbooking tape that is easily removed), pair them up and they will work to solve their partner’s problem, then they can move and find a new partner and continue solving.


9. Early finishers can work on solving problems when they finish their other work


10. Interactive bulletin board that they can go up to and work on solving during a set time during the day


11. Sent home as homework - then you can make adjustments about how many problems students are solving based on their abilities and needs.


12. Cut and paste into math journals and solve.  These could make a great problem of the day or opener for a lesson and then they can go back and reference it later when it is stored in a journal.


Did that give you an idea on where to start?  Or maybe you realized you were using task cards without even knowing it.  How do you use task cards in your classroom?


If you want to try out task cards for free, I have two free samples in my store.  The first is a place value set. This freebie includes 16 task cards that cover expanded form, skip counting, base ten blocks and comparing numbers. They are all Common Core Aligned and designed for second grade.


My other free sample is designed for upper elementary and focuses on learning states and capitals.  It includes the states in the West region and comes with a QR code on each card to scan for the answer.  Give task cards a try and let me know what you think!  


I
6

5 Time Saving Tips for Powerpoint

Hi Everyone, Sara here from Sara J Creations with some time saving tips for Powerpoint.  Do you use Powerpoint?  I made the move to Powerpoint when I started on TpT and learned about the awesomeness of this little program.  I always thought Powerpoint was for creating a presentation or slide show.  Wrong, wrong, wrong.  Yes, it can be used for that, but it can be used for so much more.  When I was in the classroom, Word was my go to program.  I created worksheets, notes to parents, newsletters, and more.  And now I just sit back and wish I had all those hours back where I fought with word to format a picture exactly like I wanted or create a new page identical to one I've already used.  Enter Powerpoint!

I have 5 tips for saving time on Powerpoint.  Whether you are new to Powerpoint, have been using it for years, create and sell products for TpT, or design for your own classroom or house, these tips are for you!

Just a note: I use Windows 10 (I'm still getting used to it) and recently updated to Powerpoint (Office) 2013.  Your program might look a little different than mine depending on what versions you use.

When you open Powerpoint, the slide that automatically pops up is designed for a slide show on your computer.  I found myself constantly changing the slide size to print on standard paper.  This step was driving me nuts each time I created something.  Here's how to solve that - create templates of the sizes you use the most.

Under slide size, choose the size that you use frequently (for me it was 8.5"x 11") and just keep the slide blank.

Go to File > Save As and switch the file type to PowerPoint Template.  It will automatically save this to your documents in a folder called Custom Office Templates.
I have a vertical template, horizontal template, square template, brag tag template and task card template.  Now, I don't have to start from scratch.  I open the template for the product I want to create and it is already formatted for me, no need to adjust the slide size.
Have you ever seen that paint brush in the corner of the home screen?  This is on Word, too.  That is a format painter and I remember learning about this in my computer class in high school and it is a feature I've used ever since. 


Let's say you format a text (meaning you picked the font, size and spacing) and you want something else that you type to look the same way.  In my example above, I wanted Alternate Uses to look just like Directions for Use to keep it consistent on the page.  I could highlight Alternate Uses and go up and change the font, size and spacing by myself by using Directions For Use to help me with remembering what numbers.  Or I can use the format painter.

Highlight the text that you want it to look like, so in this case Directions For Use.  Then double click on the format painter.


While the format painter is selected, highlight the text you want changed.  It will automatically switch it so that it is formatted the exact same way that your original text that you selected was formatted.  No need to remember what font you used, how big it was, if you made it bold, if you left justified it, etc.  The format painter will do it all for you.
Confession : I read about this tip on TpT (in the forums) and updated to Microsoft Office 2013 just for this feature.  I had 2010 before and it wasn't available in that version.  I HATE change.  Updating any sort of technology makes me cringe.  I hate getting used to something new.  But I did, just so I could use this next tip I'm going to show you.

Have you ever tried to match the color of text that you are using to something else in your document like clip art, a logo, digital paper, picture, etc.?  I was doing this a lot to match things to the color of my blog.  I would just pick something that looked close.  Well, with the eye dropper tool, it does all the work for you and the color is an exact match.  

Let's say that you wanted your text to match some clip art like in the example below.  
Insert the picture that you are using.  Then, highlight the text that you want to color.  Go to the Format tab and click text fill.  Then select eyedropper.
You will get a little eye dropper and a square that shows up close the color that the dropper is pointing to.  It will also give you the specific numbers and letters for the color if you need it (but you don't for this trick.)  Click once you've found the color you want.
Your text now matches the clip art!!

Another way that I love to use this trick is when I am starting something from scratch and I'm trying to figure out what colors to use.  I have a Pinterest board called Color Combinations where I save different color palettes that I like.
If I want to make the text or background in my product using the color schemes I saved, it is easy!  Just open up the board, and click on the pin that you want.
When you get to this screen, right click on the image and click copy image.
Then go back to your Powerpoint document and paste the image.
Use the same steps as above to use the eye dropper to select each of the colors you want to use.  If you need to repeat a color, it should show up in your recent colors so you really only need to use the eye dropper once for each color if you keep the document open.
Just delete the Pinterest image from your document when you are done.  I love using this tool because I don't often think of color combinations like this on my own and there are so many colors out there beyond the standard colors that are on the Powerpoint list.  This helps me to narrow down what I want to use.

This tip is for replacing the fonts in your text.  Let's say you have pages of work and realize the font doesn't look right.  Or maybe it is something you created a while ago and the font is outdated.  You could go page by page, highlight the text and then change it.  Or you could use the Replace Fonts feature.
In the home tab, on the far right there is a Replace button.  Click that, then click Replace fonts.
Under Replace there will be a drop down menu with all of the fonts that are in your document.  Select the one you want to change.  
Then for the part that says With: you will select the new fonts from the drop down menu.  That menu includes all fonts that are installed on your computer.  Click Replace.
All the fonts in your entire document will be changed to your newly selected font without you having to go page by page.

Another way to use the Replace feature is if you want to change certain words throughout the text.  The one time I really use this is to change the date.  Sometimes when I'm creating a product, I use an older product to get me set up and then change the content.  I put my copyright information on every page and include the year.  So I might have a new product that I just created but it was similar to an older product so I used the old version as my template.  Now all of my dates say 2014 instead of 2015.
Go to Replace again and use Replace instead of Replace Fonts.
Type in what the text currently says (2014) and what you want it to say (2015).  You can click Find Next if you want it to go page by page and show you the change before it replaces it.  This would be helpful if you didn't want to replace every word in the text, only certain ones.  Or you can click Replace All which is what I do because I know that I want every date in my product, whether in my cover or my footer at the bottom, to say 2015.
Have you ever wanted to reuse a slide that you already created or parts from a different document?  You could open both screens and cut and paste, but there is an easier way.  Reuse slides!!


Under the Home tab, click New Slide and then go down to the bottom and choose Reuse Slides.

On the right side, it will show you frequently used documents but you can also click browse and go find the document you are looking for.  I like to do this with my terms of use/thank you page because it is something I add to each document and there are a lot of parts and formatting so I wouldn't want to cut and paste it all.
Once you've selected the document you want to open, all of the slides in the document will open.  Find the one you want and click on it.  BUT before you do that, make sure that the box that says Keep Source Formatting is checked.  If not, you might lose some of your formatting like the background.
An exact copy of that slide is now in the document.  It is just like the other slides, you can still move it and change it and it will not change the original document it came from.

Another similar feature is the Duplicate Selected Slides feature.  This is if you want to use a slide again but it is in the same product.  I like to do this when I am making task cards.  I spend a lot of time getting the background, clip art and text just right and I don't want to have to do that for each page of cards.  Plus I want to make sure they are all exactly the same.
To get a copy, go to Home then find New Slide and then go down to Duplicate Selected Slides.  Now that same slide will appear again.
You just have to change the text that is on it.  I start by changing the numbers and then change the text on each card.

Wow!  Did you catch all of that?  Hopefully, this helped you and you learned a few new tricks to speed up your work time.  What tip was new to you that you are going to try out soon?
14
Powered by Blogger.